Showing posts with label JavaScript. Show all posts

Making Pages Inside Blogger Posts

Pages inside Post ImageContinuing from my recent post about the Page hack in Blogger, I have been asked by some of my readers to implement the same thing inside a Post. Well some might why is it needed in the first place? , the reasoning behind that is to make your Post look a little short (Even when they are not). The method I will be employing is in no ways a clean one and will require to include a JavaScript file individually in each post followed by a full rearrangement (Just Copy-Paste) of the contents.


See Demo


How to add this into your Posts:
1. Firstly we will be adding the following JavaScript to the end of the Post ( In the Edit HTML Tab)


<script src="http://stylifyyourblog1.googlecode.com/svn/trunk/pageinpost.js" ></script>
<script type="text/javascript">
activatables('page', ['page-1', 'page-2','page-3' ]);
</script>

I am assuming that you will be making three pages namely page-1, page-2 & page-3


2. Now either add the CSS to the end of the Post or inside the Edit HTML of the Blog.


<style>
div.content11 {clear: left;padding: 1em;}
div.content11.inactive {display: none;}
ol#toc {height: 2em;list-style: none;margin: 0;padding: 0;}
ol#toc a {padding: 0px 8px 0px;margin: 1px 4px;text-decoration: none;border:1px solid #999;-webkit-border-radius:3px;-moz-border-radius:3px;}
ol#toc a:hover {background-color: #DBECF8;padding: 0px 8px 0px;border:1px solid #204e73;}
ol#toc a:hover span {background-position: 100% -120px;}
ol#toc li {float: left;margin: 0 6px 0 0;}
ol#toc li a.active {background-color: #48f;background-position: 0 -60px;color: #fff;font-weight: bold;}
ol#toc li a.active span {background-position: 100% -60px;}
ol#toc span {background: url(tabs.gif) 100% 0;display: block;line-height: 2em;padding-right: 10px;}
</style>


3. Now Here is the Basic HTML Markup in which you will have to rearrange your Post Content into content  into :


<div class="content11" id="page-1">

The content of Page One

</div>
<div class="content11" id="page-2">

The content of Page Two

</div>
<div class="content11" id="page-3">

The content of Page Three

</div>

<ol id="toc">
<li><a href="#page-1">1</a></li>
<li><a href="#page-2">2</a></li>
<li><a href="#page-3">3</a></li>
</ol>


Here you will observe that first div section is given the Id page-1, which is the link of the first item of the ordered list as well if you see the JavaScript above, you will see how it is being used.


One word of Advice, after pasting the above code (The ol list) in the Edit HTML Tab, if you go to the Compose Tab and then go back to Edit HTML tab ,you will see the links have changed in the href , if you don't revert them back to only # ones, then this will not work. So either add this code just at the end of writing your Post or don't switch to Compose tab :(


This might be a little lengthy way of achieving Pagination inside post, but the results will be better looking and a bit less lengthy posts. Thanks to Chad Guzman & Aliester for suggesting this idea. And I know this script has a lot of space for improvement.


Having problems, feel free to drop by

See Demo


Implementing EnlargeIt! in Blogger

EnlargeIt! is a little Javascript. It enlarges thumbnail images beautifully with a mouse click. You can use different animations if you like.

Features:
>works for pictures, flash files, FLV videos, YouTube videos, DivX videos and iframes
>enlarge several files at the same time
>grouping of and navigation between files

Note: This tutorial requires that you either have a free Dropbox account or some other file hosting which provides a folder options.


Steps to Add it to Blogger:

1.Login to the Blogger account


2. Now Go to Design > Edit HTML.


3.Now search for the </head> tag and paste the following code just Above/Before it.

<link href="http://dl.dropbox.com/u/27675057/EnlargeIt_1.1_20081219/Examples/enlargeitdemo.css" rel="stylesheet" type="text/css"></link> 
<script src="http://dl.dropbox.com/u/27675057/EnlargeIt_1.1_20081219/Examples/files/enlargeit.js" type="text/javascript">
</script>
In Enlargeit.js you will have to change the path of the "enl_gifpath" to the "files" directory of the EnlargeIt! folder hosted on a Free Host


2.Go to the Post/Page you want to add EnlargeIt! and then go to Edit HTML tab .


3.Now copy the code from below and paste it there.


<link href="http://dl.dropbox.com/u/27675057/EnlargeIt_1.1_20081219/Examples/enlargeitdemo.css" rel="stylesheet" type="text/css"></link> 
<script src="http://dl.dropbox.com/u/27675057/EnlargeIt_1.1_20081219/Examples/files/enlargeit.js" type="text/javascript">
</script>
In Enlargeit.js you will have to change the path of the "enl_gifpath" to the "files" directory of the EnlargeIt! folder hosted on a Free Host


4.Now for adding the images into EnlargeIt! ,is a little different ,just see the following code:


<img longdesc="normal_hor1.jpg" onclick="enlarge(this);" src="thumb_hor1.jpg" />


As you see we added a longdesc attribute which contains the larger version of the image and a onclick attribute to link it the JavaScript.


It includes all the images into a gallery if not specified ,to add a specific image in a gallery ,just add a class="YourGalleryName" to those images.


This JavaScript can function even without using a Snippet. But there are many customized snippet possible for this JavaScript.Here are some of them


As Used in the Demo
<script type="text/javascript">
enl_ani = 1;
enl_brdcolor = '#FFFFFF';
enl_titletxtcol = '#444444';
enl_ajaxcolor = '#d0d0d0';
enl_brdsize = 20;
enl_maxstep = 15;
enl_speed = 12;
enl_shadow = 1;
enl_shadowintens = 20;
enl_shadowsize = 1;
enl_center = 1;
enl_dark = 1;
enl_darkprct = 20;
enl_preload = 1;
enl_drgdrop = 0;
enl_darksteps = 20;
enl_keynav = 1;
enl_wheelnav = 1;
enl_opaglide = 0;
enl_minuscur='minuscur.cur';
enl_brdround = 1;
enl_brdbck = '';
enl_buttonurl[0] = 'prev';
enl_buttontxt[0] = 'Previous picture [left arrow key]';
enl_buttonoff[0] = -180;
enl_buttonurl[1] = 'next';
enl_buttontxt[1] = 'Next picture [right arrow key]';
enl_buttonoff[1] = -198;
enl_buttonurl[2] = 'close';
enl_buttontxt[2] = 'Close [Esc key]';
enl_buttonoff[2] = -126;
enl_gifpath = 'http://dl.dropbox.com/u/27675057/EnlargeIt_1.1_20081219/Examples/files/';
enl_btnact='bact.png';
enl_btninact='binact.png';
</script>


Another one
<script type="text/javascript"> 
enl_ani = 2;
enl_brdcolor = '#111133';
enl_titletxtcol = '#ffffaa';
enl_ajaxcolor = '#d0d0d0';
enl_brdsize = 6;
enl_maxstep = 22;
enl_speed = 12;
enl_shadow = 1;
enl_shadowintens = 35;
enl_shadowcolor = 'yellow';
enl_shadowsize = 0;
enl_center = 0;
enl_dark = 0;
enl_darkprct = 20;
enl_preload = 1;
enl_drgdrop = 1;
enl_darksteps = 20;
enl_keynav = 1;
enl_wheelnav = 1;
enl_opaglide = 1;
enl_minuscur='minuscur.cur';
enl_brdround = 1;
enl_brdbck = '';
enl_buttonurl[0] = 'prev';
enl_buttontxt[0] = 'Previous picture [left arrow key]';
enl_buttonoff[0] = -180;
enl_buttonurl[1] = 'next';
enl_buttontxt[1] = 'Next picture [right arrow key]';
enl_buttonoff[1] = -198;
enl_buttonurl[2] = 'close';
enl_buttontxt[2] = 'Close [Esc key]';
enl_buttonoff[2] = -126;
enl_gifpath = 'http://dl.dropbox.com/u/27675057/EnlargeIt_1.1_20081219/Examples/files/';
enl_btnact='bact.png';
enl_btninact='binact.png';
</script>


Another One
<script type="text/javascript"> 
enl_ani = 0;
enl_brdcolor = '#ffffff';
enl_titletxtcol = '#000000';
enl_ajaxcolor = '#d0d0d0';
enl_brdsize = 25;
enl_maxstep = 22;
enl_speed = 12;
enl_shadow = 1;
enl_shadowintens = 20;
enl_shadowsize = 1;
enl_center = 1;
enl_dark = 2;
enl_darkprct = 50;
enl_preload = 1;
enl_drgdrop = 0;
enl_darksteps = 1;
enl_keynav = 1;
enl_wheelnav = 1;
enl_opaglide = 0;
enl_minuscur='minuscur.cur';
enl_brdround = 1;
enl_brdbck = 'b_marble.png';
enl_buttonurl[0] = 'prev';
enl_buttontxt[0] = 'Previous picture [left arrow key]';
enl_buttonoff[0] = -144;
enl_buttonurl[1] = 'next';
enl_buttontxt[1] = 'Next picture [right arrow key]';
enl_buttonoff[1] = -162;
enl_buttonurl[2] = 'close';
enl_buttontxt[2] = 'Close [Esc key]';
enl_buttonoff[2] = -270;
enl_gifpath = 'http://dl.dropbox.com/u/27675057/EnlargeIt_1.1_20081219/Examples/files/';
enl_btnact='bact.png';
enl_btninact='binact.png';
</script>


Another One
<script type="text/javascript"> 
enl_ani = 3;
enl_brdcolor = '#FFFFFF';
enl_titletxtcol = '#444444';
enl_ajaxcolor = '#d0d0d0';
enl_brdsize = 20;
enl_maxstep = 30;
enl_speed = 12;
enl_shadow = 1;
enl_shadowintens = 20;
enl_shadowsize = 1;
enl_center = 0;
enl_dark = 1;
enl_darkprct = 20;
enl_preload = 1;
enl_drgdrop = 0;
enl_darksteps = 5;
enl_keynav = 1;
enl_wheelnav = 1;
enl_opaglide = 0;
enl_minuscur='minuscur.cur';
enl_brdround = 1;
enl_brdbck = '';
enl_buttonurl[0] = 'prev';
enl_buttontxt[0] = 'Previous picture [left arrow key]';
enl_buttonoff[0] = -216;
enl_buttonurl[1] = 'next';
enl_buttontxt[1] = 'Next picture [right arrow key]';
enl_buttonoff[1] = -234;
enl_buttonurl[2] = 'close';
enl_buttontxt[2] = 'Close [Esc key]';
enl_buttonoff[2] = -0;
enl_gifpath = 'http://dl.dropbox.com/u/27675057/EnlargeIt_1.1_20081219/Examples/files/';
enl_btnact='bact.png';
enl_btninact='binact.png';
</script>


You can also add YouTube Videos and iFrame to EnlargeIt!:


<a href="http://www.youtube.com/v/xGbnua2kSa8&amp;fs=1&amp;rel=0" onclick="return false;" target="imgwindow"><img alt="That's What Friends Are For" class="group3" id="pic4fl" longdesc="swf::http://www.youtube.com/v/xGbnua2kSa8&amp;fs=1&amp;rel=0::480::385" onclick="enlarge(this);" src="http://enlargeit.timos-welt.de/english/img/thumb_thatswhatfriends.jpg" title="" /></a>

<a href="http://www.google.com/" onclick="return false;" target="imgwindow"><img alt="Google" class="group3" id="pic5fal" longdesc="ifr::http://www.google.com::650::400" onclick="enlarge(this);" src="http://enlargeit.timos-welt.de/english/img/thumb_google.jpg" title="" /></a>


5.Now save the Post/Page.

Note: Please Host all the files on free hosting service like DropBox or Blogspot itself!


Implementing Syntax Highlighter in Blogger

Syntax Highlighter is a simple JavaScript which is used to represent your Code in a more sophisticated manner.I have used this in nearly all my previous posts.In this tutorial I will be implementing Version 2.1.364 of SH. It has the ability to copy Code into the Clipboard and also supports 13 different brushes.


Steps to Add it to Blogger:

1.Login to the Blogger account


2.Go to Blogger Dashboard >Design>Edit HTML. First backup your Template (See how to Back it up)


3.Now copy the code from below and paste it just Above/Before </head> tag.


<link href='http://agorbatchev.typepad.com/pub/sh/2_1_364/styles/shCore.css' rel='stylesheet' type='text/css'/> 
<link href='http://agorbatchev.typepad.com/pub/sh/2_1_364/styles/shThemeDefault.css' rel='stylesheet' type='text/css'/>
<script src='http://agorbatchev.typepad.com/pub/sh/2_1_364/scripts/shCore.js' type='text/javascript'/>
<script src='http://agorbatchev.typepad.com/pub/sh/2_1_364/scripts/shBrushXml.js' type='text/javascript'/>
<script src='http://agorbatchev.typepad.com/pub/sh/2_1_364/scripts/shBrushBash.js' type='text/javascript'/>
<script src='http://agorbatchev.typepad.com/pub/sh/2_1_364/scripts/shBrushCpp.js' type='text/javascript'/>
<script src='http://agorbatchev.typepad.com/pub/sh/2_1_364/scripts/shBrushCSharp.js' type='text/javascript'/>
<script src='http://agorbatchev.typepad.com/pub/sh/2_1_364/scripts/shBrushCss.js' type='text/javascript'/>
<script src='http://agorbatchev.typepad.com/pub/sh/2_1_364/scripts/shBrushJava.js' type='text/javascript'/>
<script src='http://agorbatchev.typepad.com/pub/sh/2_1_364/scripts/shBrushJScript.js' type='text/javascript'/>
<script src='http://agorbatchev.typepad.com/pub/sh/2_1_364/scripts/shBrushPhp.js' type='text/javascript'/>
<script src='http://agorbatchev.typepad.com/pub/sh/2_1_364/scripts/shBrushPython.js' type='text/javascript'/>
<script src='http://agorbatchev.typepad.com/pub/sh/2_1_364/scripts/shBrushRuby.js' type='text/javascript'/>
<script src='http://agorbatchev.typepad.com/pub/sh/2_1_364/scripts/shBrushSql.js' type='text/javascript'/>
<script src='http://agorbatchev.typepad.com/pub/sh/2_1_364/scripts/shBrushVb.js' type='text/javascript'/>
<script src='http://agorbatchev.typepad.com/pub/sh/2_1_364/scripts/shBrushPerl.js' type='text/javascript'/>

See only the first Three Line of code is necessary ,rest of the code is dependent on which Brush you want to use .For example if you want to use XML Brush then include only XML related file.

4.Now include the following code just Above/Before the </body> tag.


<script language='javascript'> 
SyntaxHighlighter.config.bloggerMode = true;
SyntaxHighlighter.config.clipboardSwf = &#39;http://agorbatchev.typepad.com/pub/sh/2_1_364/scripts/clipboard.swf&#39;;
SyntaxHighlighter.all();
</script>


5.Now for applying this to your code just paste the code in between the following code:

<pre class="brush: BRUSH-NAME">

Paste Your Code Here

</pre>


The "BRUSH-NAME" needs to be changed by the Brush you want to use. Like for example if you want to use xml Brush then change "BRUSH-NAME" with xml. All the code should be Escaped (Visit this Page to make your Code Escaped)

Now some extra features : For Highlighting the code see the following code:

<pre class="brush: xml;highlight: [2,4];">
This Line is Highlighted
This Line is not Highlighted
This Line is again Highlighted
</pre>

To Hide the Toolbar

<pre class="brush: xml; toolbar: false;">

If You observe ,there is no Toolbar

</pre>


Unlimited Bandwidth Image & JavaScript Hosting

Hosting is a vital part of any Website or Blog. In the following tutorial I will be telling you how to host Images (JUST for the sake) and JavaScript files on Blogger platform (with UNLIMITED BANDWIDTH that is). Image hosted on Blogger is no big surprise but the main focus of this tutorial is hosting JS files on Blogger which can be quite useful. The main reason I am doing this post is because ,all the Past posts I have done as well as many of the incoming Future posts that I will do ,use a JS file as their core. This simple trick will do away with all the problem related to hosting JS files on Third Party Servers.


Image Hosting on Blogger


Whenever a image is added into Blogger Blog, it automatically assigns a Picasa album to it .These images can then be used anywhere ,that too with unlimited bandwidth.


Steps to Add Images into Blogger
1. Go to Blogger Dashboard ---> NEW POST
2. Click the Compose tab ---> Click on Insert Image Icon ()


3. Click the Choose Files button


4. Select the Files and Click the Open Button 


Wait for a while till the image is finished uploading.

5. Select the Uploaded image and Click the Add Selected button.


6. Click on the Edit HTML tab 


7. You will see the two image Urls, but u pick Original image URL after the href tag like below. 


Use the image any where you want with unlimited bandwidth


JavaScript Hosting on Blogger

Blogger allows external JS files to be accessed using the script tag like this:


<script src='http://Your-Hosting-Service-Url/Jquery.js' type='text/javascript'/>

But this is well and good until you have Good Hosting Service.There are many free Hosting services Like DropBox and Google Code(Quite Good indeed) but why call it from a external source when you can easily embed it in Blogger itself! To do that observe the following code:


<script type='text/javascript'>
//<![CDATA[
<--Paste all code here from .js file -->
//]]>
</script>

Just in place of "<--Paste all code here from .js file -->" line in above code ,copy the whole content of your JS file(Open the JS File in NotePad and do the Plain Old CTRL+A , followed by CTRL+C ,Then go the place where you have the above code and CTRL+V in the place of the highlighted line [Remove the highlighted line] ).And your javascript codes are now Ready which are now hosted on Blogger itself !


Here I want to make a special mention of the CDN a.k.a. Content Distribution Network whose most common example is googleapis.These CDN are like Super-Duper fast servers which reduce access time with their dedicated bandwidths.


The following is a example of jQuery Framework hosted on GoogleAPIS:


http://ajax.googleapis.com/ajax/libs/jquery/1.6.2/jquery.min.js

It is your personal choice whether you want to host your JS file on Blogger or get it through these CDN services or Locally. I personally prefer that these framework be accessed through the Googleapis and the JS file of the Plugin be hosted on Blogger.

Whats Your Take on this ?,feel free to share it.

Implementing jsImagebox in Blogger

jsImageBox is a compact and easy to connect a script that allows you to display enlarged image in a popup box. Script code is only 9kb. For his work on the page you want to connect only a single js file. The script is written without using third-party frameworks and libraries, so that should not cause conflicts when connecting to sites that have already made ​​with the use of any framework.


Steps to Add it to Blogger:

1.Login to the Blogger account


2. Now Go to Design > Edit HTML.


3.Now search for the </head> tag and paste the following code just Above/Before it.

<script src="http://dl.dropbox.com/u/27675057/JsImgbox/jsibox_basic.js" type="text/javascript">
</script>


2.Go to the Post/Page you want to add jsImagebox and then go to Edit HTML tab .


3.Now copy the code from below and paste it there.


<script src="http://dl.dropbox.com/u/27675057/JsImgbox/jsibox_basic.js" type="text/javascript">
</script>


4.Now for adding the images into jsImagebox ,Firstly add the image normally using Insert Image Button


Now When you see the code in the edit HTML window it would be something like this

<a href="1.jpg" title="Hello Title"><img src="1_1.jpg"/></a>


Make it like this

<a href="1.jpg" onclick="return jsiBoxOpen(this)" rel="rr" title="Hello Title"><img  src="1_1.jpg" /></a>

As you see we only added a rel="rr" tag and a onclick="return jsiBoxOpen(this)" 


jsImagebox automatically detects galleries.


5.Now save the Post/Page.


Note: Please Host all the files on free hosting service like DropBox or Blogspot itself!


Another Important thing to note is that all the images used in this tutorial like Next button ,Previous button ,etc are all hosted on Google Code service which are the fastest and most reliable servers on the internet with the least downtime.So you can easily implement this with no hassles for Image Hosting.
             

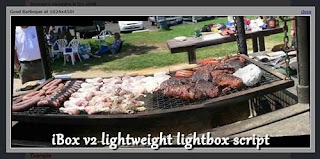
Implementing iBox in Blogger

iBox is a lightweight script that lets you overlay images and documents in a small dialog without a page reload. It's built to be easy to install and use.

iBox easily supports the standard overlay of images, in many sizes, and will automatically scale down the window if the browser's viewpane is too small.


Steps to Add it to Blogger:


1.Login to the Blogger account.


2. Now Go to Design > Edit HTML.


3.Now search for the </head> tag and paste the following code just Above/Before it.

<script src="http://dl.dropbox.com/u/27675057/iBox/ibox.js" type="text/javascript">
</script>
<link href="http://dl.dropbox.com/u/27675057/iBox/ibox.css" media="screen" rel="stylesheet" type="text/css"></link>


2.Go to the Post/Page you want to add iBox and then go to Edit HTML tab .


3.Now copy the code from below and paste it there.


<script src="http://dl.dropbox.com/u/27675057/iBox/ibox.js" type="text/javascript">
</script>
<link href="http://dl.dropbox.com/u/27675057/iBox/ibox.css" media="screen" rel="stylesheet" type="text/css"></link>


4.Now for adding the images into iBox ,Firstly add the image normally using Insert Image button


Now When you see the code in the edit HTML Window it would be something like this


<a href="large3.jpg"><img border="0" height="90" src="/small3.jpg" width="120" /></a>


Make it like this 


<
a rel="ibox" href="large3.jpg"><img border="0" height="90" src="/small3.jpg" width="120" /></a>

As you see we only addeda rel="ibox"


Some Example Code:
Single
<a href="http://www.enthropia.com/labs/ibox/images/large/image_1b.jpg" rel="ibox" title="Good Barbeque at 1024x450!"><img alt="" src="http://www.enthropia.com/labs/ibox/images/small/image_1.jpg" /></a>

Ajax
<a href="http://www.enthropia.com/labs/ibox/ibox-ajax-test.html" rel="ibox" title="Loading External HTML File using AJAX" >ibox-ajax-test.html</a>


Inline
<a href="#inner_content" rel="ibox" title="Loading Internal HTML Content" >#inner_content</a>
<div id="inner_content" style="display:none;">
<div style="background:#000000;color:#ffffff;border:1px dashed #FFFFFF;padding:15px;margin:15px;">

<h2>
It is a hidden div!</h2>
<p>
If you were to view source, you would find a div called 'inner_content'. This is that div. We have used CSS to set its display property to none, but using <a href="http://www.enthropia.com/blog/p_ibox.html">iBox</a>, you can clearly see it as an overlay. Hurrah!</p>
<p>
It is even styled. Oh so pretty it is</p>
</div>
</div>


Youtube
<a href="http://www.youtube.com/watch?v=Sr2JneittqQ" rel="ibox">My YouTube Video</a>


PHP
<a href="login.php" rel="ibox&amp;width=275" target="ibox-login.html" title="Login">Login Form</a>


5.Now save the Post/Page and see the magic.

Note: Please Host all the files on free hosting service like DropBox or Blogspot itself !


Another Important thing to note is that all the images used in this tutorial like Loader.gif is hosted on Google Code service which are the fastest and most reliable servers on the internet with the least downtime.So you can easily implement this with no hassles for Image Hosting


© 2009 Blogger Tips 2013 | Powered by Blogger