

Showing posts with label Mootools. Show all posts

Implementing PhotoBoard in Blogger

Want to show off your Photos in a cluttered fashion, then this is the right Plugin for you. Photoboard is based on Mootools framework and gives you the capability to define a space where you can freely Drag your Pictures  (and even move them over each other!).The code is tiny, as it relies heavily on the framework for much of the functionality.


Steps to Add it to Blogger:

1.Login to the Blogger account


2. Now Go to Design > Edit HTML.


3.Now search for the </head> tag and paste the following code just Above/Before it.

<link type="text/css" href="http://dl.dropbox.com/u/27675057/Photoboard/style.css" rel="stylesheet" media="screen"> 
<link type="text/css" href="http://dl.dropbox.com/u/27675057/Photoboard/photoboard.css" rel="stylesheet" media="screen">
<script type="text/javascript" src="http://dl.dropbox.com/u/27675057/Photoboard/mootools-1.2.4-core-yc.js"></script>
<script type="text/javascript" src="http://dl.dropbox.com/u/27675057/Photoboard/mootools-1.2.4.2-more.js"></script>

Now Search for the </body> tag and Paste the following code Above/Before it.


<script src="http://dl.dropbox.com/u/27675057/Photoboard/photoboard.js"></script> 
<script>
window.addEvent('domready', function() {
var photos = new PhotoBoard('photo-board');
});
</script>


2.Go to the Post/Page you want to add PhotoBoard and then go to Edit HTML tab .


3.Now copy the code from below and paste it there.


<link type="text/css" href="http://dl.dropbox.com/u/27675057/Photoboard/style.css" rel="stylesheet" media="screen"> 
<link type="text/css" href="http://dl.dropbox.com/u/27675057/Photoboard/photoboard.css" rel="stylesheet" media="screen">
<script type="text/javascript" src="http://dl.dropbox.com/u/27675057/Photoboard/mootools-1.2.4-core-yc.js"></script>
<script type="text/javascript" src="http://dl.dropbox.com/u/27675057/Photoboard/mootools-1.2.4.2-more.js"></script>


-----------THIS AREA CONTAINS ALL THE PICTURES--------------

<script src="http://dl.dropbox.com/u/27675057/Photoboard/photoboard.js"></script>
<script>
window.addEvent('domready', function() {
var photos = new PhotoBoard('photo-board');
});
</script>


4.Now for adding the images into PhotoBoard ,See the following Markup below.


<div class="span-24 last">
<div id="photo-board" name="PhotoBoard_Controller">

<div class="photo" style="left: -43px; top: 106px;">
<img src="s.jpg"width="500" height="375">
</div>

<div class="photo" style="left: 73px; top: 137px;">
<img src="as.jpg"width="500" height="331">
</div>

<div class="photo" style="left: 37px; top: 36px;">
<img src="e.jpg"width="500" height="375">
</div>

<div class="photo" style="left: 175px; top: 133px;">
<img src="r.jpg"width="500" height="336">
</div>

<div class="photo" style="left: -32px; top: 69px;">
<img src="l.jpg"width="500" height="335">
</div>

<div class="photo" style="left: 88px; top: 147px;">
<img src="n.jpg"width="500" height="375">
</div>

<div class="photo" style="left: 255px; top: 26px;">
<img src="l.jpg"width="434" height="262">
</div>


</div>
</div>

The First Two Div tags are used for linking the pictures with the plugin and the rest of DIV tags act as containers for the Images. A class "photo" is necessary in each of these pictures. The style attribute used in every container defines the initial position of the picture.You can move the pictures in this area freely ,drag them over each other (Tip: To bring a Picture in the background to the foreground, just drag it to the corner most point and then Bring it Back)


Want to change the Dimensions of the Area occupied by the Photoboard ?
For this open photoboard.css and change the height & width attribute of #photo-board .


5.Now save the Post/Page.

Note: Please Host all the files on free hosting service like DropBox or Blogspot itself!


Implementing ZoomIt in Blogger

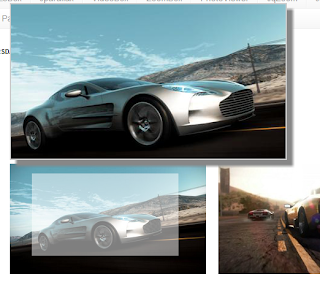
ZoomIt is a JavaScript image zoom developed for MooTools 1.3 (1.2 compatible) and jQuery that allows display of detailed, large images based on smaller images that can be placed into the context of web pages.

A new approach, different from the previous one (that can be seen here) allows easier placement and implementation along with possibilities of styling using CSS classes placed in stylesheets. The two script versions (for jQuery and MooTools) offer the very same functionality so whatever your preference, you get the same thing no matter what JavaScript framework you use.

This tutorial is for the Mootools version.


Steps to Add it to Blogger:

1.Login to the Blogger account


2. Now Go to Design > Edit HTML.


3.Now search for the </head> tag and paste the following code just Above/Before it.

<script language="javascript" type="text/javascript" src="http://dl.dropbox.com/u/27675057/Zoomit/mootools-core-1.3.2-full-compat-yc.js"></script> 
<script language="javascript" type="text/javascript" src="http://dl.dropbox.com/u/27675057/Zoomit/mootools-more-1.3.2.1-drag-assets.js"></script>
<script language="javascript" type="text/javascript" src="http://dl.dropbox.com/u/27675057/Zoomit/zoomit-mootools.min.js"></script>

<link rel="stylesheet" type="text/css" href="http://dl.dropbox.com/u/27675057/Zoomit/stylesheet/zoomIt.css" />


2.Go to the Post/Page you want to add ZoomIt and then go to Edit HTML tab .


3.Now copy the code from below and paste it there.


<script language="javascript" type="text/javascript" src="http://dl.dropbox.com/u/27675057/Zoomit/mootools-core-1.3.2-full-compat-yc.js"></script> 
<script language="javascript" type="text/javascript" src="http://dl.dropbox.com/u/27675057/Zoomit/mootools-more-1.3.2.1-drag-assets.js"></script>
<script language="javascript" type="text/javascript" src="http://dl.dropbox.com/u/27675057/Zoomit/zoomit-mootools.min.js"></script>

<link rel="stylesheet" type="text/css" href="http://dl.dropbox.com/u/27675057/Zoomit/stylesheet/zoomIt.css" />


4.Now for adding the images into ZoomIt ,Firstly add the image normally using Insert Image Button


Now When you see the codein the edit HTML window it would be something like this

<a href="large3.jpg"><img border="0" height="90" src="/small3.jpg" width="120" /></a>


Make it like this 


<a class="zoomit" href="large3.jpg"><img border="0" height="90" src="/small3.jpg" width="120" /></a>

As you see we only added class="zoomit" .Now add the following javascript snippet to link it to script.

<script language="javascript" type="text/javascript"> 
//use load event on window
window.addEvent('load', function(){
var zoomer = new ZoomIt({
'elems':'.zoomIt',
'multiplier':1.4,
'zoomPosition':'top'
});
});
</script>

ZoomIt provides a lot of options to customize the plugin.Below is a list of them


Parameters

There are 12 parameters that can be set and 2 Events (start of zoom and ending of zoom). The parameters are:
  1. container (MooTools only): optional parameter that tells the script into what element to scan for elements that will have zoom capability. If this parameter isn’t set, by default the script will scan the whole body;
  2. elems: required parameter that contains the selector CSS class for the elements to have zoom applied to them (ie: .zoomImages);
  3. mouseEvent: the event that will trigger the zoomed image to be displayed. Can have as values either click, mouseenter or mouseover;
  4. multiplier: this parameter determines the size of the zoomed image area. You can use any number here and the size of the zoomed area will be multiplier*thumbnail image size. This means that if your thumbnail is 150 x 150 px, a multiplier of 1 will display a zoomed image of 150 x 150. Decreasing this value will make the size of the zoomed image smaller, increasing it will make it bigger;
  5. zoomPosition: by default there are only 4 positions available: top, left, right, bottom. This is the position where the zoomed image will be displayed in relation with the thumbnail image;
  6. zoomDistance: this parameter controls the distance between the zoomed image and the thumbnail. A value of 0 will display the zoomed image right next to the thumbnail image;
  7. zoomClass: if you want to add additional styles to the container having the zoomed image inside it, set this parameter with a CSS class (ie: myExtraStyles) and in your stylesheet add this class with the CSS rules you want applied to it;
  8. zoomLoadingClass: similar to the parameter above but it applies only when loading the big image;
  9. zoomAreaClass: like zoomClass but it applies to the small zoomed area from the thumbnail image;
  10. zoomAreaColor: the background color of the small zoomed area;
  11. zoomAreaOpacity: the opacity of the small zoomed area;
  12. zoomAreaMove: what mouse event should change the position of the zoomed image (can be drag or mousemove).
The 2 events the script fires are onZoom (for jQuery just zoom) and onClose (for jQuery just close). They get fired when the image zooming process starts and ends and they return the element being zoomed.


5.Now save the Post/Page.

Note: Please Host all the files on free hosting service like DropBox
 or Blogspot itself!
Another Important thing to note is that all the images used in this tutorial like Next button ,Previous button ,etc are all hosted on Google Code service which are the fastest and most reliable servers on the internet with the least downtime.So you can easily implement this with no hassles for Image Hosting.


© 2009 Blogger Tips 2013 | Powered by Blogger