Showing posts with label Lightbox. Show all posts

Implementing jsBloggerLightbox in Blogger

jsBloggerLigthbox is based on jQuery framework and is created by James Simpson of J.S. Blog Stop (A great resource for Blogger Related Tutorials).

The one thing that makes this different from other Lightbox scripts is its easy of integration. Normally when you add a Lightbox in a website ,you have to fiddle with the HTML of  all the elements (Images,iFrame,etc) to which you have to apply the Lightboxing effect but in the case of jsBloggerLightbox you just have to include the script and the rest is taken care by it.

Currently it only supports images.



Steps to Add it to Blogger:

1.Login to the Blogger account


2. Now Go to Design > Edit HTML.(Firstly Backup your Template)


3.Now search for the </head> tag and paste the following code just Above/Before it.

<script src='http://code.jquery.com/jquery-latest.js'></script> 
<script src='http://jsblogstop-blogger-feed-tools.googlecode.com/svn/trunk/jsBloggerLightBox.js' type='text/javascript'></script>

This Lightbox automatically detects images and display them in the overlay window.


2.Go to the Post/Page you want to add jsBloggerLightbox and then go to Edit HTML tab .


3.Now copy the code from below and paste it there.


<script src='http://code.jquery.com/jquery-latest.js'></script> 
<script src='http://jsblogstop-blogger-feed-tools.googlecode.com/svn/trunk/jsBloggerLightBox.js' type='text/javascript'></script>
This Lightbox automatically detects images and display them in the overlay window.


4.Now save the Post/Page.

Implementing Orangebox in Blogger

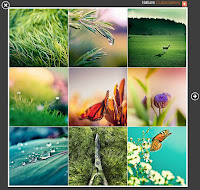
OrangeBox is made to be simple. The javascript is just 16KB but has powerful features. It supports common image file types, QuickTime movies, SWF files, inline content, iFrames, and Vimeo & YouTube video streaming as well as item groups with navigation, hidden item groups, keyboard navigation, and image preloading.There is also a added functionality for sharing each element using AddThis widget.


Steps to Add it to Blogger:

1.Login to the Blogger account


2. Now Go to Design > Edit HTML.


3.Now search for the </head> tag and paste the following code just Above/Before it.

<link rel="stylesheet" href="http://dl.dropbox.com/u/27675057/orangebox/css/orangebox.css" type="text/css" media="screen" />
<link rel="stylesheet" href="http://orangebox.davidpaulhamilton.net/styles.css" type="text/css" media="screen" />
<script src="http://code.jquery.com/jquery-1.6.1.min.js"></script>
<script type="text/javascript" src="http://dl.dropbox.com/u/27675057/orangebox/js/orangebox.js"></script>


2.Go to the Post/Page you want to add Orangebox and then go to Edit HTML tab .


3.Now copy the code from below and paste it there.


<link rel="stylesheet" href="http://dl.dropbox.com/u/27675057/orangebox/css/orangebox.css" type="text/css" media="screen" />
<link rel="stylesheet" href="http://orangebox.davidpaulhamilton.net/styles.css" type="text/css" media="screen" />
<script src="http://code.jquery.com/jquery-1.6.1.min.js"></script>
<script type="text/javascript" src="http://dl.dropbox.com/u/27675057/orangebox/js/orangebox.js"></script>


4.Now for adding the images into Orangebox ,Firstly add the image normally using Insert Image Button


Now When you see the codein the edit HTML window it would be something like this

<a href="large3.jpg"><img src="small3.jpg" /></a>


Make it like this 


<a data-ob_caption="This is the caption" data-ob_linkText="CubaGallery"  rel="lightbox" href="large3.jpg"><img  src="small3.jpg" /></a>


As you see we only added a rel tag "lightbox". The "data-ob_caption" is for giving small description of the lightboxed elements which appears on hovering over it. The "data-ob_linkText" is for giving the title to the Element.


Now to add Galleries just see the replace rel="lightbox" with rel"lightbox[GroupName]" where GroupName is the name of the specific gallery.

To add any element including iFrame, SWF,Youtube,Vimeo,etc just add rel="lightbox" into it.


Update:There is a minor bug in this plugin that if you try to make a gallery only containing Videos in it then none of the members of that group are loaded in the overlay window.


5.Now save the Post/Page.

Note: Please Host all the files on free hosting service like DropBox or Blogspot itself!


Another Important thing to note is that all the images used in this tutorial like Next button ,Previous button ,etc are all hosted on Google Code service which are the fastest and most reliable servers on the internet with the least downtime.So you can easily implement this with no hassles for Image Hosting.


© 2009 Blogger Tips 2013 | Powered by Blogger