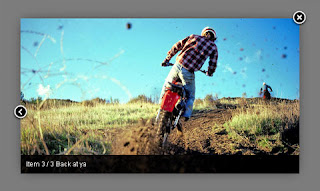
 CeraBox is the alternative Lightbox build on MooTools 1.3, inspired by Fancybox.Requires MooTools 1.3 + MooTools more Assets.
CeraBox is a JavaScript plugin used to display larger images (or other objects) without leaving the page using modal dialogs. The CeraBox is triggered by clicking a standard anchor tag. When JavaScript is disabled the objects will still be opened, but without the Cerabox effect.
Steps to Add it to Blogger:
1.Login to the Blogger account
2. Now Go to Design > Edit HTML.
3.Now search for the </head> tag and paste the following code just Above/Before it.
<link href="http://dl.dropbox.com/u/27675057/cerabox/style/cerabox.css" media="screen" rel="stylesheet"></link>
<script src="http://dl.dropbox.com/u/27675057/cerabox/All.js" type="text/javascript">
</script>
2.Go to the Post/Page you want to add Cerabox and then go to Edit HTML tab .
3.Now copy the code from below and paste it there.
<link href="http://dl.dropbox.com/u/27675057/cerabox/style/cerabox.css" media="screen" rel="stylesheet"></link>
<script src="http://dl.dropbox.com/u/27675057/cerabox/All.js" type="text/javascript">
</script>
4.Now for adding the images into Cerabox ,Firstly add the image normally using Insert Image Button
Now When you see the codein the edit HTML window it would be something like this
<a href="large3.jpg"><img border="0" height="90" src="/small3.jpg" width="120" /></a> |
Make it like this
| <a class="cerabox" href="large3.jpg"><img border="0" height="90" src="/small3.jpg" width="120" /></a></div> |
As you see we only added class="cerabox" and wrapped it around a div tag.Now add the following javascript snippet to link it to lightbox.
<script type="text/javascript">
var box = new CeraBox();
window.addEvent('domready', function(){
 box.addItems('#example1 a', {
  animation: 'ease',
  loaderAtItem: true,
  group: false
 });
});
</script>
To add Gallery just add a group (group:true)attribute in the JavaScript
<script type="text/javascript">
var box = new CeraBox();
window.addEvent('domready', function(){
 box.addItems('#example1 a', {
  animation: 'fade',
  loaderAtItem: true,
               group: false
 });
});
</script>
It also provides some options,Here are the options:
| Option | Default value | Description |
|---|---|---|
| ajax | null | Object that holds the property 'type' for it's request method and optional 'data' to be send. |
| group | true | 'true' enables slideshow functionality where 'false' disables this. |
| animation | 'fade' | 'fade' fades in the content from the center of the window where 'ease' resizes it from it's original place to the center of the window. |
| displayTitle | true | 'true' displays the title of the image where 'false' hides this. |
| displayOverlay | true | 'true' enables the background overlay behind the box where 'false' disables this. |
| clickToClose | false | 'true' adds a click event to the content which closes the CeraBox. |
| fullSize | false | 'true' makes sure the content doesn't get resized by it's window size. |
| loaderAtItem | false | 'true' displays the loading spinner at the center of the selected item. |
| width | null | Width the content should be in pixels or percent (combine this with fullSize to make it fixed). |
| height | null | Height the content should be in pixels or percent (combine this with fullSize to make it fixed). |
| events | Object | Callback functions that can be used to run custom code at specific actions, these override the default callbacks set at initialization. |
| errorLoadingMessage | 'The req...' | String displayed when the requested content could not be loaded. |
| addContentProtectionLayer | false | Places a layer over images to protect it from being copied the easy way. |
5.Now save the Post/Page.
Note: Please Host all the files on free hosting service like DropBox or Blogspot itself!
Another Important thing to note is that all the images used in this tutorial like Next button ,Previous button ,etc are all hosted on Google Code service which are the fastest and most reliable servers on the internet with the least downtime.So you can easily implement this with no hassles for Image Hosting.


0 comments:
Post a Comment