 Star Ratings are graphical representation of the likability of a post generally measured on the scale of 5 and represented by stars. This can act as a useful alternative for collecting information about the likability of posts as many readers shy away from leaving comments. Not only is it faster than commenting also there is a added element of anonymity. In this tutorial we will be learning how to embed JS-Kit star rating in Blogger and some handy tricks related to it
Demo
Before we get started
We will be using the Old Interface for this tutorial as the New Interface throws up unexpected errors when editing the template. In case you are one of the people who joined Blogger recently then there might be a chance that you have no access to the Old Interface. To overcome this problem , type the following URL into the address bar
Replace the highlighted number with your Blog's ID . To find the Blog ID , observe the Address Bar while surfing through the Stats , Layout , Template pages of your Blog . You will see a similar large number . That would be your Blog ID
Video Tutorial
Steps
1. Go to Blogger Dashboard and open up the Design Tab of the blog in which you want to add the Star Ratings

2. Now click the Edit HTML button and tick the Exapnd Widget Preview option

3. Now search for <div class='post-header-line-1'/> and add the following code just after it
<div class='js-kit-rating' expr:path='data:post.url' expr:permalink='data:post.url' expr:title='data:post.title'>
</div>

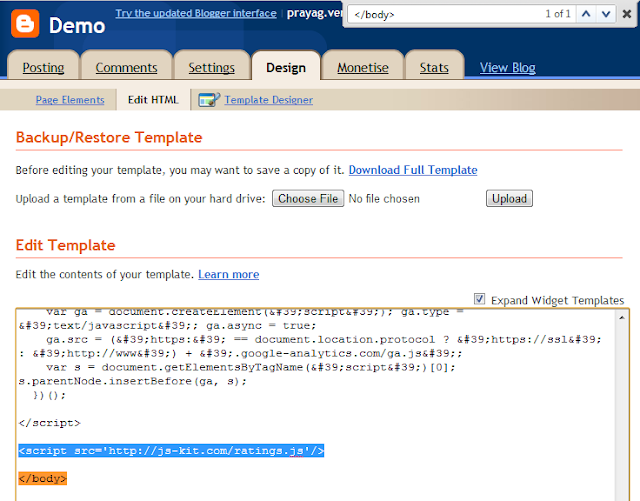
4. Now search for </body> tag and add the following code just before it
<script src='http://js-kit.com/ratings.js'/>

5. Lastly add the following CSS just before ]]></b:skin> tag
.js-kit-rating {
height:45px;
text-indent: -9999px;
overflow:hidden;
text-indent: -9999px;
width:85px !important;
} 
6. Hit the Save Template button and view your blog to see where the ratings widget appear
Some handy tricks
Removing Attribution
As you might have observed ,when you hover over the Ratings , there appears a attribution just besides it , to remove it add the following CSS
.js-kit-rating {
height:45px;
overflow:hidden;
width:85px !important;
}
Removing Total votes text
By default under the ratings , the total numbers of votes cast are shown , to remove it add the following CSS
.js-kit-rating {
height:45px;
text-indent: -9999px;
overflow:hidden;
width:85px !important;
}
Showing the Thumbs Style
In case you are a fan of the Thumbs up , Thumbs down style of rating ,then replace the code in the Step 3 above by the following code
<div class='js-kit-rating' view="score"  expr:path='data:post.url' expr:permalink='data:post.url' expr:title='data:post.title'>
</div>
Feel free to share any tricks or problems that you face while implementing this Rating widget. Blogger also has a inbuilt Rating system , I will be doing a tutorial about it soon


0 comments:
Post a Comment