Implementing Hidden Hover Gallery in Blogger

This is a very special type of gallery which uses some simple jQuery to accomplish some really cool looking sliding-upon-hover type effects. To make it look even better the sliding-upon-hover effect is accompanied with the Bounce effect which further adds a bit of eye-candy. This comes in 2 different styles, namely vertical and horizontal. It is simple to actualize into your Blog Design and is sophisticated enough to fit into it.


             See Demo                                                                                            Download


Steps to Add it to Blogger:

1.Login to the Blogger account


2. Now Go to Design > Edit HTML.


3.Now search for the </head> tag and paste the following code just Above/Before it. (How to copy code easily)
<link href="style.css" rel="stylesheet" type="text/css" /> 

<script src="http://ajax.googleapis.com/ajax/libs/jquery/1.2.6/jquery.min.js" type="text/javascript"></script>

<script src="jquery.easing.1.3.js" type="text/javascript"></script>


Note: Please Host all the files on free hosting service like DropBox or Blogspot itself!


2.Go to the Post/Page you want to add this plugin and then go to Edit HTML tab .


3.Now copy the code from below and paste it there. (How to copy code easily)

<link href="style.css" rel="stylesheet" type="text/css" /> 

<script src="http://ajax.googleapis.com/ajax/libs/jquery/1.2.6/jquery.min.js" type="text/javascript"></script>

<script src="jquery.easing.1.3.js" type="text/javascript"></script>


Note: Please Host all the files on free hosting service like DropBox or Blogspot itself!


4.Now for adding the images into this plugin see the following markup:


<ul id="KeyWord">

<li><img src="1.jpg" width="782" alt="" height="440" /></li>

<li><img src="2.jpg" width="782" alt="" height="440" /></li>

<li><img src="3.jpg" width="782" alt="" height="440" /></li>

<li><img src="4.jpg" width="782" alt="" height="440" /></li>

<li><img src="5.jpg" width="782" alt="" height="440" /></li>

</ul>


You can change Keyword with either horizontal or vertical as per choice of effect.

Now the JavaScript to link it to the plugin


<script language="javascript">

$(document).ready(function(){


//horizontal

$("ul#horizontal li").mouseover(function(){

$(this).stop().animate({width:'650px'},{queue:false, duration:600, easing: 'easeOutBounce'})

});

$("ul#horizontal li").mouseout(function(){

$(this).stop().animate({width:'40px'},{queue:false, duration:600, easing: 'easeOutBounce'})

});


//vertical

$("ul#vertical li").mouseover(function(){

$(this).stop().animate({height:'400px'},{queue:false, duration:600, easing: 'easeOutBounce'})

});

$("ul#vertical li").mouseout(function(){

$(this).stop().animate({height:'42px'},{queue:false, duration:600, easing: 'easeOutBounce'})

});

});

</script>


The width and height depends on the resolution of your images.

5.Now save the Post/Page.


             See Demo                                                                                            Download


Scrolling/Ticker Recent Post Gadget For Blogger

Displaying a list of the recent posts in your sidebar is a great way to keep your visitors busy. There are lots of recent posts gadgets you can use but the one we will be covering  in this post will definitely grab the attention of people on your blog.

This recent posts widget is similar to the standard recent posts with thumbnails but with one twist. It combines jQuery vticker plugin to produce a simple and sleek sliding effect that smoothly scrolls through the posts.


See Demo


Steps to Add it to Blogger:

1.Login to the Blogger account


2. Now Go to Design > Page Elements (For New Interface go to Layout)


3.Now in the sidebar Click on "Add a Gadget" and then choose the HTML/JavaScript gadget 


4.Now copy the following code and paste it into the HTML/JavaScript gadget : (How to copy code easily)


<style>img.recent_thumb {padding:1px;width:55px;height:55px;border:0;float:right;margin:0 0 5px 10px;}.recent_posts_with_thumbs {float: left;width: 100%;min-height: 70px;margin: 5px 0px 5px 0px;padding: 0;font-size:12px;}ul.recent_posts_with_thumbs li {padding-bottom:5px;padding-top:5px;min-height:65px;}.recent_posts_with_thumbs a {text-decoration:none;}.recent_posts_with_thumbs strong {font-size:10px;}</style>
<script src="http://ajax.googleapis.com/ajax/libs/jquery/1.4.2/jquery.min.js"></script>
<script style='text/javascript' src="http://stylifyyourblog1.googlecode.com/svn/trunk/recentpostticker.js" ></script>
<script style='text/javascript' src='http://tavristasos.googlecode.com/svn-history/r100/trunk/recentpostswiththumbnailsv3.js'></script>
<script style='text/javascript'>
var numposts = 7;
var showpostthumbnails = true;
var displaymore = false;
var displayseparator = false;
var showcommentnum = false;
var showpostdate = false;
var showpostsummary = false;
var numchars = 100;
$(document).ready(function () {$('#sai').vTicker({
speed: 500,
pause: 3000,
showItems: 3,
animation: 'fade',
mousePause: false,
height: 0,
direction: 'up'
});});
</script>
<div id="sai">
<script src='http://www.YourBlogURL.blogspot.com/feeds/posts/default?orderby=published&alt=json-in-script&callback=showrecentpostswiththumbs'></script>
</div>


Updated: There were some issues people were facing ,just externalized the JavaScript and its working fine now.


Important : If you have already included jQuery library in your Blog then remove the Line 2 from Above code


Important : If you look in the code you will find http://www.YourBlogURL.blogspot.com/ replace this with your blogs URL.


Optional Changes :

There are lot of changes that can be made to the code , the main edit you may want to make is the number of posts scrolled and displayed. To change the number of posts that are scrolled through change the following present at Line 6:


numposts =7;


You can change from 7 to the number of posts you wish to have scrolled.

Now to change the number of post that are displayed at any given time ,change the following attribute present at Line 17:


showItems:3


You can change from 3 to the number of posts you wish to have displayed at any given time.


To change the time interval and speed of the scroll Change speed:500 & pause:3000 present at Line 15-16 of the code. pause defines the Interval between the Scroll and speed defines at what pace is to the scroll done (all values are in microseconds).


Other changes like whether to display comments, description, Post date,etc can be done by changing the parameter from false to true (Present from Line 6 to 13 in code)


A Very Important Thing To Note : It might happen that the scroll effect might not work, the main reason behind this can be conflict between some jQuery plugin already present in your Blog, The most common solution to this is to add the following code after this gadget:

<script type='text/javascript'>
jQuery.noConflict();
</script>


If the scroll effect still doesn't work then you might have to remove any other jQuery plugin completely so as to make this gadget work.


5.Now Click on Save.


See Demo

Implementing Z-Index Gallery in Blogger

Z-index Gallery is a combination of CSS property ‘z-index’ and the power of jQuery to create a unique gallery which have a appearance of a pile of pictures. This incorporates simplicity with eye candy to deliver a full fledged experience of viewing piles of pictures as if in hand.

This can be further customized to include features like randomness ,random picture control, slightly random positions each time,Forward & Back Buttons, Preloader Effect,etc. Feel free to change the code to your needs and share it with us.


             See Demo                                                                                            Download


Steps to Add it to Blogger:

1.Login to the Blogger account


2. Now Go to Design > Edit HTML.


3.Now search for the </head> tag and paste the following code just Above/Before it. (How to copy code easily)
<link rel="stylesheet" type="text/css" media="screen" href="reset.css" /> 

<link rel="stylesheet" type="text/css" media="screen" href="960.css" />

<link rel="stylesheet" type="text/css" media="screen" href="main.css" />

<script type="text/javascript" src="http://ajax.googleapis.com/ajax/libs/jquery/1.6.2/jquery.min.js "></script>

<script type="text/javascript" src="demo.js"></script>


Note: Please Host all the files on free hosting service like DropBox or Blogspot itself!


2.Go to the Post/Page you want to add this plugin and then go to Edit HTML tab .


3.Now copy the code from below and paste it there. (How to copy code easily)

<link rel="stylesheet" type="text/css" media="screen" href="reset.css" /> 

<link rel="stylesheet" type="text/css" media="screen" href="960.css" />

<link rel="stylesheet" type="text/css" media="screen" href="main.css" />

<script type="text/javascript" src="http://ajax.googleapis.com/ajax/libs/jquery/1.6.2/jquery.min.js "></script>

<script type="text/javascript" src="demo.js"></script>


Note: Please Host all the files on free hosting service like DropBox or Blogspot itself!


4.Now for adding the images into this plugin see the following markup:


<div class="grid_6 prefix_1 suffix_1" id="gallery">

<div id="pictures">

<img src="picture1.png" />

<img src="picture2.png" />

<img src="picture3.png" />

<img src="picture4.png" />

<img src="picture5.png" />

</div>


<div class="grid_3 alpha" id="prev">

<a href="#previous">&laquo; Previous Picture</a>

</div>

<div class="grid_3 omega" id="next">

<a href="#next">Next Picture &raquo;</a>

</div>

</div>


The div block with id "pictures" contains the images to be displayed.

Here you can easily customize the Next and Previous Text with Images . For Next Button images search Here

There is another customized version of this plugin which displays a preloader before the images ,to apply it ,just replace the demo.js file with the demo1.js file present in the js folder of the Download package.


5.Now save the Post/Page.


             See Demo                                                                                            Download


Implementing Smooth Div Scroll in Blogger

Smooth Div Scroll is a jQuery plugin that scrolls content horizontally. Apart from many of the other scrolling plugins that have been written for jQuery, Smooth Div Scroll does not limit the scroling to distinct steps. As the name of the plugin hints, scrolling is smooth. There are no visible buttons or links since the scrolling is done using hotspots within the scrollable area or via autoscrolling.


             See Demo                                                                                            Download


Steps to Add it to Blogger:

1.Login to the Blogger account


2. Now Go to Design > Edit HTML.


3.Now search for the </head> tag and paste the following code just Above/Before it. (How to copy code easily)

<link rel="Stylesheet" type="text/css" href="smoothDivScroll.css" /> 

<script src="https://ajax.googleapis.com/ajax/libs/jquery/1.5.2/jquery.min.js" type="text/javascript"></script>

<script src="jquery.ui.widget.js" type="text/javascript"></script>

<script src="jquery.smoothDivScroll-1.1-min.js" type="text/javascript"></script>


<script type="text/javascript">

$(window).load(function() {

$("div#makeMeScrollable").smoothDivScroll({ autoScroll: "onstart",

autoScrollDirection: "backandforth",

autoScrollStep: 1,

autoScrollInterval: 15,

startAtElementId: "startAtMe",

visibleHotSpots: "always" });


});

</script>

<style type="text/css">


#makeMeScrollable

{

width:100%;

height: 330px;

position: relative;

}


#makeMeScrollable div.scrollableArea *

{

position: relative;

float: left;

margin: 0;

padding: 0;

}


</style>

Note: Please Host all the files on free hosting service like DropBox or Blogspot itself!


2.Go to the Post/Page you want to add this plugin and then go to Edit HTML tab .


3.Now copy the code from below and paste it there. (How to copy code easily)

<link rel="Stylesheet" type="text/css" href="smoothDivScroll.css" /> 

<script src="https://ajax.googleapis.com/ajax/libs/jquery/1.5.2/jquery.min.js" type="text/javascript"></script>

<script src="jquery.ui.widget.js" type="text/javascript"></script>

<script src="jquery.smoothDivScroll-1.1-min.js" type="text/javascript"></script>


<script type="text/javascript">

$(window).load(function() {

$("div#makeMeScrollable").smoothDivScroll({ autoScroll: "onstart",

autoScrollDirection: "backandforth",

autoScrollStep: 1,

autoScrollInterval: 15,

startAtElementId: "startAtMe",

visibleHotSpots: "always" });


});

</script>

<style type="text/css">


#makeMeScrollable

{

width:100%;

height: 330px;

position: relative;

}


#makeMeScrollable div.scrollableArea *

{

position: relative;

float: left;

margin: 0;

padding: 0;

}


</style>


Note: Please Host all the files on free hosting service like DropBox or Blogspot itself!


4.Now for adding the images into this plugin see the following markup:


<div id="makeMeScrollable">

<div class="scrollingHotSpotLeft">

</div>

<div class="scrollingHotSpotRight">

</div>

<div class="scrollWrapper">

<div class="scrollableArea">

<img src="field.jpg" /><img src="gnome.jpg" /><img src="pencils.jpg" /><img src="golf.jpg" /><img src="river.jpg" /><img src="train.jpg" /><img src="leaf.jpg" /><img src="dog.jpg"\ />

</div>

</div>

</div>


Here you might observe that we have placed all the img tags with no spaces in between them, this is because if the img tag is placed in the next line then Blogger Editor by default adds a br tag in between the line which in-turn disturbs the indenting of the images and they appear out of place, do therefore leave no space between them.


5.Now save the Post/Page.


             See Demo                                                                                            Download


Implementing jCarousel + Captify in Blogger

This plugin is a combination jQuery jCarousel and jQuery Captify together to create a slick and cool way of showing the thumbnails and captions. Thumbnails can be scrolled with the use of previous and next buttons and when rolling/hovering over any thumbnail, the caption or the title of the thumbnail will slide up.


             See Demo                                                                                            Download


Steps to Add it to Blogger:

1.Login to the Blogger account


2. Now Go to Design > Edit HTML.


3.Now search for the </head> tag and paste the following code just Above/Before it.
<script type="text/javascript" src="http://ajax.googleapis.com/ajax/libs/jquery/1.3.2/jquery.min.js"></script> 

<script type="text/javascript" src="jcarousellite_1.0.1.pack.js"></script>

<script type="text/javascript" src="captify.tiny.js"></script>


<script type="text/javascript">

$(function() {

$(".slider").jCarouselLite({

btnNext: ".next",

btnPrev: ".prev",

visible: 5,

auto: 900

});

});


$(document).ready(function(){

$('img.captify').captify({

// all of these options are... optional

// ---

// speed of the mouseover effect

speedOver: 'fast',

// speed of the mouseout effect

speedOut: 'normal',

// how long to delay the hiding of the caption after mouseout (ms)

hideDelay: 500,

// 'fade', 'slide', 'always-on'

animation: 'slide',

// text/html to be placed at the beginning of every caption

prefix: '',

// opacity of the caption on mouse over

opacity: '0.7',

// the name of the CSS class to apply to the caption box

className: 'caption-bottom',

// position of the caption (top or bottom)

position: 'bottom',

// caption span % of the image

spanWidth: '100%'

});

});


</script>


Now Search for ]]></b:skin> Using Ctrl+F and paste the following CSS code Above/Before it:

a:link {

color:#0054a6;

text-decoration:none;

}

}

/************************************************

JCAROUSEL LITE

************************************************/

#list {

height:130px;

width:880px;

margin:30px auto;

}


.slider {

float:left;

left: -5000px;

margin:15px;

position:relative;

visibility:hidden;

}


.slider ul {

height:100px;

width:600px;

}


.slider ul li {

padding:0 20px;

}


.slider ul li img {

cursor:pointer;

height:100px;

padding-top:3px;

width:120px;

}


.prev {

cursor:pointer;

float:left;

padding-top:90px;

}


.next {

cursor:pointer;

float:right;

padding-top:80px;

padding-right:110px;

}


/************************************************

CAPTIFY CAPTION

************************************************/

.caption-top, .caption-bottom {

background: #000000;

color: #ffffff;

cursor:default;

padding:2px;

font-size:11px;

text-align:center;

}


.caption-top {

border-width:0px;

}


.caption-bottom {

border-width:0px;

}


.caption a, .caption a {

background:#000;

border:none;

text-decoration:none;

padding:2px;

}


.caption a:hover, .caption a:hover {

background:#202020;

}


2.Go to the Post/Page you want to add this plugin and then go to Edit HTML tab .


3.Now copy the code from below and paste it there.


<style>

a:link {

color:#0054a6;

text-decoration:none;

}

}

/************************************************

JCAROUSEL LITE

************************************************/

#list {

height:130px;

width:880px;

margin:30px auto;

}


.slider {

float:left;

left: -5000px;

margin:15px;

position:relative;

visibility:hidden;

}


.slider ul {

height:100px;

width:600px;

}


.slider ul li {

padding:0 20px;

}


.slider ul li img {

cursor:pointer;

height:100px;

padding-top:3px;

width:120px;

}


.prev {

cursor:pointer;

float:left;

padding-top:90px;

}


.next {

cursor:pointer;

float:right;

padding-top:80px;

padding-right:110px;

}


/************************************************

CAPTIFY CAPTION

************************************************/

.caption-top, .caption-bottom {

background: #000000;

color: #ffffff;

cursor:default;

padding:2px;

font-size:11px;

text-align:center;

}


.caption-top {

border-width:0px;

}


.caption-bottom {

border-width:0px;

}


.caption a, .caption a {

background:#000;

border:none;

text-decoration:none;

padding:2px;

}


.caption a:hover, .caption a:hover {

background:#202020;

}

</style>


<script type="text/javascript" src="http://ajax.googleapis.com/ajax/libs/jquery/1.3.2/jquery.min.js"></script>

<script type="text/javascript" src="jcarousellite_1.0.1.pack.js"></script>

<script type="text/javascript" src="captify.tiny.js"></script>

<script type="text/javascript">

$(function() {

$(".slider").jCarouselLite({

btnNext: ".next",

btnPrev: ".prev",

visible: 5,

auto: 900

});

});


$(document).ready(function(){

$('img.captify').captify({

// all of these options are... optional

// ---

// speed of the mouseover effect

speedOver: 'fast',

// speed of the mouseout effect

speedOut: 'normal',

// how long to delay the hiding of the caption after mouseout (ms)

hideDelay: 500,

// 'fade', 'slide', 'always-on'

animation: 'slide',

// text/html to be placed at the beginning of every caption

prefix: '',

// opacity of the caption on mouse over

opacity: '0.7',

// the name of the CSS class to apply to the caption box

className: 'caption-bottom',

// position of the caption (top or bottom)

position: 'bottom',

// caption span % of the image

spanWidth: '100%'

});

});


</script>


4.Now for adding the images into this plugin see the following markup:


<div id="list">

<div class="prev">

<img src="https://blogger.googleusercontent.com/img/b/R29vZ2xl/AVvXsEhZn7O3JTULIwju7uGfIgEUQP2canK8ycsS9WRSS9nec-rYpEBLdtO6iif6-oexWOQxu0QAIsw9jtAzD5UhtlnADmNZhypWjU3u5XyWENF9NjZqvYdRAQ7B2-DmXvoVTHKV8Xn0vFmcumHj/s1600/prev.jpg" alt="prev" /></div>


<div class="slider">

<ul>

<li>

<a href="#" title="Title 1"><img src="1.jpg" alt="Title 1" class="captify" /></a>

</li>

<li>

<a href="#" title="Title 2"><img src="2.jpg" alt="Title 2" class="captify" /></a>

</li>

<li>

<a href="#" title="Title 3"><img src="3.jpg" alt="Title 3" class="captify" /></a>

</li>

</ul>

</div>

<div class="next">

<img src="https://blogger.googleusercontent.com/img/b/R29vZ2xl/AVvXsEiNzLdPau9mrzS4vpTYCq9xPDN_BnpuhVwJa_bTROHsPXw2zZnPVMocCgOKR3_13apx3q1bDx55Il645lO6Xfeg4CCn_5um8y1lYLesjPz7TEEa4MVfP4jlELl4vtX85wTPt-MhjG0fPCXC/s1600/next.jpg" alt="next" /></div>

</div>

</div>


Here Title tag will contain the text which will appear when the thumbnail is rolled/hovered upon.
Another Important thing to note is that the positioning of the Next and Previous Arrows can be out of place , to rectify this just manually change the placement of the arrows using the
.next and .prev attributes present in the CSS Code.


5.Now save the Post/Page.


Note: Please Host all the files on free hosting service like DropBox or Blogspot itself!


             See Demo                                                                                            Download


Hosting your files on Dropbox

Dropbox is a free file hosting service. In this tutorial I will be showing you how to use it host your files ( specially scripts ). Its major plus over other similar services is the capability of Direct links to your files which can be used over the Internet. Some of its other features are :
-10GB/Day Bandwidth
-2GB Storage space (Extendable to 10GB with referring )
-Ability to share folders with other members
-Syncs files automatically (only with Dropbox Software)
-Works with Windows, Mac, Linux, iPad, iPhone, Android and Blackberry


There are two ways by which you can upload your files to Dropbox:
1. Through Dropbox Software
2. Through Dropbox website


Before continuing make sure you have registered with Dropbox ,if not Click Here .

Now lets get Started Firstly using Dropbox Software :

1: Download the DropBox Software form Here, and then Launch the DropBox Setup by Double Clicking the Installer.


2: Click Install button in DropBox Setup pop up window and Wait Until the software completes Installation.


3: After Completing installation, DropBox Setup opens another popup window for account settings. Select the "I already have a Dropbox account Button" (If you have not created the account ,then create it Here) .


4: Now enter your details and Press "Next"


5: Choose 2 GB Free account and Click Next button


6: Choose Typical settings and Click Install button


8: A PopUp window opens for DropBox tour, click the Skip tour Button. 


9: Finally Click the Finish Button to Close the DropBox Setup. 


10: DropBox folder Opens automatically, If not then click the DropBox icon in the Taskbar. 


11: In DropBox folder open the Public folder, and paste your scripts or files in the Public folder. 


For getting Direct Link to you script or file, right click on the File > Go to DropBox > Click the Copy Public Link


Now uploading files using Dropbox website


 1: Register a New account on DropBox website and Login to your account

2: Click on Files tab > Open the Public Folder by Clicking on Public.


3: Click on Upload Button.


4: An Inline Pop-Up window opens, click on Choose Files Button.


5: Select the Files that you want to Upload / Host and Click Open Button.


6: Click Start Upload button to Upload your files


7:  After Completes Uploading, click the Uploaded file to open the Drop Menu options, and then Choose the Copy Public Link Option.


8: Click the Copy to Clipboard button to copy the Direct Link to your Clipboard.


Creating a Chrome Extension for your Blog

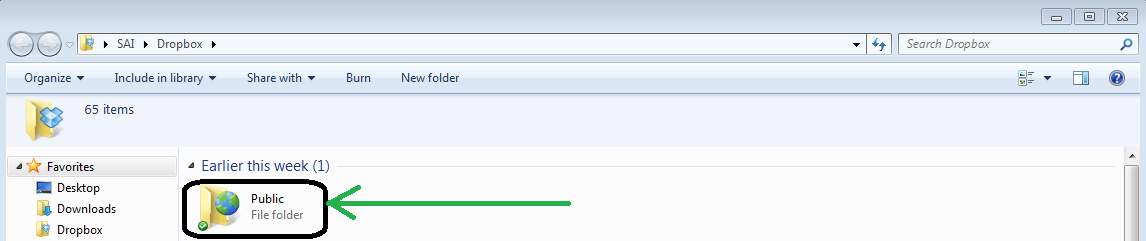
In this Post we will be creating a simple Chrome Extension which will give your readers a way to be updated with your Blogs content without actually visiting it. This Extensions will put a small Icon near the Chrome Address bar in your readers browser ,which when clicked will Display the Latest Post on your Blog in a small Popup window. I will be explaining three different versions of this Extension with some minor differences. Firstly check out StylifyYourBlog's Extension to know how it looks


Now lets get Started 

Firstly you will Need some basic things for building this extension, you can Download them here:


This Package contains Three different Extensions (Same thing just little changes)

Extension 1: Simple ,just shows the Posts
Extension 2: Shows the Posts and also slides after define time interval ,bringing into view older posts
Extension 3:Same as First one but when any post is clicked then opens the mobile version

In this package some things are common ,I will be giving a short markup about every item present:
Icon_19.png   has dimension 19 by 19 and is going to appear in the Address bar
Icon_128.png   has dimensions 128 by 128 and is going to appear in the main Chrome Extensions Tab
jquery.min.js   is the jQuery library (this you can either include in the Extension or call it through a CDN)
jquery.vticker.js   is used for dynamically changing the Feed
jquery.zrssfeed.min.js   is the plugin which fetches the feed from the Your Blog
manifest.json   is the Main file for the Extension
style.css   is the CSS file for styling the Extension
StylifyYourBlog.html   is the HTML file which will contain the main code of the popup window

Now I will explain the coding in detail:


1.Manifest.json

In this file we are specifying the Name of the extension and a Number of other options, such as browser actions ,permissions,icons etc.

In browser_actions, we put settings that are in relation with the browser window. The popup property tells Chrome, that we are going to show .html as a popup. There are a number of settings you can put in browser_actions. You can read more on Google Chrome’s Extension documentation.

{

"name": "Stylify Your Blog Extension",

"version": "1.0",

"description": "Stay Updated with the latest post from Stylify Your Blog",

"icons":{

"128":"icon_128.png"

},


"browser_action": {

"default_icon": "icon_19.png",

"popup": "StylifyYourBlog.html"

}


}

Now I will be explaining Three Different Versions of this Extension:
The Only Difference is in their HTML versions rest all coding is same (just minor changes in jquery.zrssfeed.js file)


The HTML file ( a.k.a StylifyYourBlog file in the Package )


<!DOCTYPE html>

<html>

<head>

<link rel="stylesheet" type="text/css" href="style.css" />

<script src="http://ajax.googleapis.com/ajax/libs/jquery/1.4.2/jquery.min.js">

</script>

<script src="jquery.zrssfeed.min.js"></script>

</head>


<body>


<h1>Latest Posts on Stylify Your Blog</h1>

<script type="text/javascript">

$(document).ready(function () {

$('#content').rssfeed('http://stylifyyourblog.blogspot.com/rss.xml', {

limit: 3

});

});

</script>

<div id="content"></div>


</body>

</html>

Version 1 is simple version which only shows the most recent Posts in a Popup window.

Version 3 is quite similar to Version 1 but the only difference being that when the Post is clicked it opens the Mobile Version of that post on the Popup Window itself


The HTML file ( a.k.a StylifyYourBlog file in the Package )


<!DOCTYPE html>

<html>

<head>

<link rel="stylesheet" type="text/css" href="style.css" />

<script src="http://ajax.googleapis.com/ajax/libs/jquery/1.4.2/jquery.min.js">

</script>

<script src="jquery.zrssfeed.min.js"></script>

<script src="jquery.vticker.js" type="text/javascript"></script></head>


<body>


<h1>Latest Posts on Stylify Your Blog</h1>

<script type="text/javascript">$(document).ready(function () { $('#content').rssfeed('http://YourBlogName.blogspot.com/rss.xml',{}, function(e) { $(e).find('div.rssBody').vTicker(); });});</script>

<div id="content"></div>


</body>

</html>


This is a little pepped up version which provides a Latest post with sliding ticker.


The CSS file ( a.k.a style file in the package )
*{

margin:0;

padding:0;

}


body{

/* Setting default text color, background and a font stack */

font-size:12px;

color:#666;


/* A webkit gradient: */

background:-webkit-gradient(linear, 0% 0%, 0% 100%, from(#EEE), to(#DDD));


text-shadow:1px 1px 0 white;

font-family:Arial, Helvetica, sans-serif;

overflow-x:hidden;

width:500px;

padding:10px 20px;

margin-bottom:10px;

}


a,a:visited{

color:#09F;

text-decoration:none;

}


a:hover{

text-decoration:underline;

}


h1{

/* Webkit gradient: */

background: -webkit-gradient(linear, 0% 0%, 0% 100%, from(#EEE), to(#DDD));


border-bottom: 1px solid #F0F0F0;

font-size: 24px;

font-weight: normal;

margin-bottom: 30px;

padding: 30px 0px;

text-align: center;

text-shadow: white 0px 1px 1px;

}


h2{

font-size:24px;

font-weight:normal;

right:40px;

padding-left:120px;

}


h1,h2{

font-family:"Myriad Pro",Arial,Helvetica,sans-serif;

}
To change the background Visit Here and after deciding the color copy the code labelled for (Chrome 11+) and paste it in line 12 and 34 .(Make sure you remove -image from the code you copied )

Zrssfeed
This plugin will read RSS feeds from any Website URL using the Google Feeds API. It produces structured HTML with in-built CSS classes for styling.

In Version1:I have changed it a little to work in the desired way (Added  target="new"  in all the <a> tags so that when any Item is clicked in the Popup window ,it opens a New Tab rather than in that Popup window itself!).

In Version 2: Same as Version 1 [Note: To change the time interval between Sliding Post ,just open jquery.vticker.js file and change the value of pause variable to x000 ,where x is the number of seconds (Do not remove the Zeros )]

In Version 3: Added  '?m=1' tag in the second link tag so that it loads the mobile version of the your Blogs Post in the Small Popup window itself. There is one plus point in it that the Mobile version is Auto Dimensioning so no content will appear out of place in the popup window.

Note:If the mobile version of your blog doesn't work then go to Setting > Email & Mobile and tick the Mobile templates as yes

Generating your .Crx (extension)
Firstly Put all your files in a folder.
Then in Chrome open chrome://extensions/ and then Click on Developer mode > Load unpacked extension.
After you make a change to the extension, just hit the Reload link below it.

After you’re done developing, click Pack extension and a crx file will be created for you. You can serve this file from your site and enable your site’s visitors to install it. I suggest you host it on Google Sites or best on Chrome Web Store (but then you will have to pay one time fee of 5$ )
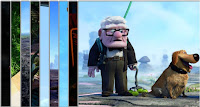
 
© 2009 Blogger Tips 2013 | Powered by Blogger