Shareaholic Share Buttons for Blogger

sexy bookmarks

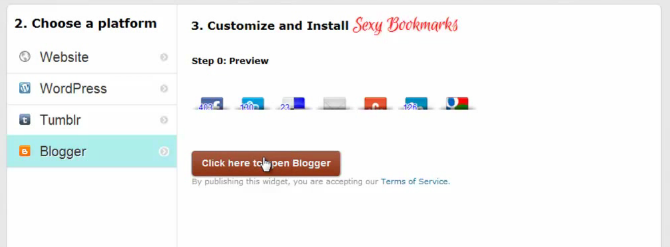
A simple Share Buttons Widget with Counts for Blogger. A one click instant install with no hassles of modifying the Template to integrate into the blog. Shareaholic Sexy Bookmarks include buttons from Facebook , Twitter , LinkedIn , Delicious , StumbleUpon , Google Bookmarks and a Email Send button with each one of them showing the number of times it has been shared previously. In this tutorial we will see how to embed it in your blog.

Demo

Video Tutorial


Steps

1. Go to http://www.shareaholic.com/ and Click the Sign Up button

shareaholic main page


2. Sign Up with either the Facebook Connect option or using your Twitter account option . You can also sign up manually too. 

shareholic create account


3. After signing up click the Website & Blog Tools Option 

blog tools shareaholic


4. Now select the Sexy Bookmarks Tab and then click the Next button

sexy bookmarks shareaholic

5. Now choose Blogger as the platform and Click the button to Install

choose platform and install

6. Now Add the Widget and check your blog to see it in action. 

shareaholic add widget to blogger


You can similarly install the Classic Bookmarks and Sassy Bookmarks too

Simple CSS3 powered Ad Banner

Ad BannerA simple Advertisment Banner style using CSS3. Ad Banners have one purpose only and thats to grab the attention of the readers and make them click through. With this in mind I designed a simple one with some simple CSS3 border-radius property.


Demo


To add this Ad Banner Widget into your blog, you can use the one click installer


Or you can add it manually

To do that just add the following CSS and HTML to a HTML/JavaScript widget

<style>
.squarebanner ul{list-style-type:none;margin: 0px auto;padding: 10px 0px 0px 0px;width:300px;overflow:hidden;}.squarebanner ul li{list-style-type:none;margin: 0px 1px 0px 3px;float:left;display:inline;background:orange;-webkit-transition:all 0.2s ease;-moz-transition:all 0.2s ease;-o-transition:all 0.2s ease;border-radius:100%;-webkit-border-radius:100%;-moz-border-radius:100%;-o-border-radius:100%;}.squarebanner ul li:hover {-webkit-transition:all 0.3s ease;-moz-transition:all 0.3s ease;-o-transition:all 0.3s ease;-o-border-radius:15%;-webkit-border-radius:15%;-moz-border-radius:15%;border-radius:15%;}.squarebanner ul li:active {-webkit-transition:all 0.2s ease;-moz-transition:all 0.2s ease;-o-transition:all 0.2s ease;-o-border-radius:50%;-webkit-border-radius:50%;-moz-border-radius:50%;border-radius:50%;}.squarebanner ul li a img{-webkit-box-shadow:0 0 8px rgba(0,0,0,0.5);-moz-box-shadow:0 0 8px rgba(0,0,0,0.5);box-shadow:0 0 8px rgba(0,0,0,0.5);padding:3px;}
</style>
<div class="squarebanner ">
<ul>
<li style="background: blue !important;">
<a href="URL">
<img height="120" src="https://blogger.googleusercontent.com/img/b/R29vZ2xl/AVvXsEgHLwLHcnISSMjAp-1mF-y-JqsofZPoNxF0wwxb5bxBIzLUc4ep4ALTwlxBTRgpzenyhX2dSXX8Jbu4M7-3W1dWiQxhjBxhgg61qgFMYVjjfCMee3PIGebZgCsiFlD4dZGgRP2mjvAx88E/s1600/Advertise+Here.png" width="120" /></a></li>
</ul>
</div>


Make sure to change the URL in Line 7 with your own

Scrolling Sticky Bar for Blogger

sticky header bar
In others word a On-Scroll Sticky Bar. A simple widget which appears in the upper part of your page as you scroll down and disappears again on reaching the top something similar to the Facebook header bar. It contains social sharing options as well as links to Home Page of your blog. Also present are the Slide to Top and Email subscribe options. This can be easily customized to include options according to your needs. Lets get started and see how to add it in your blog !


Demo
You can see the live demo on this very page itself !

Before we get started

We will be using the Old Interface for this tutorial as the New Interface throws up unexpected errors when editing the template. In case you are one of the people who joined Blogger recently then there might be a chance that you have no access to the Old Interface. To overcome this problem , type the following URL into the address bar

blogger URL

Replace the highlighted number with your Blog's ID . To find the Blog ID , observe the Address Bar while surfing through the Stats , Layout , Template pages of your Blog . You will see a similar large number . That would be your Blog ID


Video Tutorial


Steps

1. Go to Blogger Dashboard and open up the Design Tab of the blog in which you want to add the Scrolling Sticky Bar. Now select the Edit HTML option

Blogger Dashboard Old


2. Now search for <body tag  ( See Video tutorial for more details ) and add the following code just below it


<div id='SYB-Bar-Container'>
<div id='SYB-Bar-Content'>
<ul id='SYB-Bar-Left'>
<li class='Home'> <a href='http://www.stylifyyourblog.com/'>Home</a> </li>
<li class='Share'> <div id='share-top'>
<ul>
<li> <a class='twitter-share-button' data-count='horizontal' href='http://twitter.com/share'>Tweet</a> </li>
<li> <g:plusone size='medium'></g:plusone> </li>
<li> <div class='fb-like' data-font='verdana' data-layout='button_count' data-send='false' data-show-faces='false'>
</div></li></ul>
<div style='clear:both;'></div></div></li>
</ul>
<ul id='SYB-Bar-Right'>
<li class='Subscribe'> <div class='SYB-email'>
<form action='http://feedburner.google.com/fb/a/mailverify' method='post' onsubmit='window.open(&#39;http://feedburner.google.com/fb/a/mailverify?uri=stylifyyourblog&#39;, &#39;popupwindow&#39;, &#39;scrollbars=yes,width=550,height=520&#39;);return true' style='padding:3px;text-align:center;' target='popupwindow'>
<input class='textarea' gtbfieldid='3' name='email' onblur='if (this.value == "") {this.value = "";}' onfocus='if (this.value == "") {this.value = "";}' placeholder=' Enter Your Email Address :)' type='text' value=''/> <input name='uri' type='hidden' value='stylifyyourblog'/><input name='loc' type='hidden' value='en_US'/> <input class='SYB-emailsubmit' type='submit' value='Subscribe'/> </form>
<a href="http://www.stylifyyourblog.com" title="Stylify Your Blog" ><img src="http://img1.blogblog.com/img/blank.gif" /></a> </div></li>
<li class='btt'> <a href='#top' title='Back to top'>Slide to Top &#8593;</a> </li>
</ul></div></div>


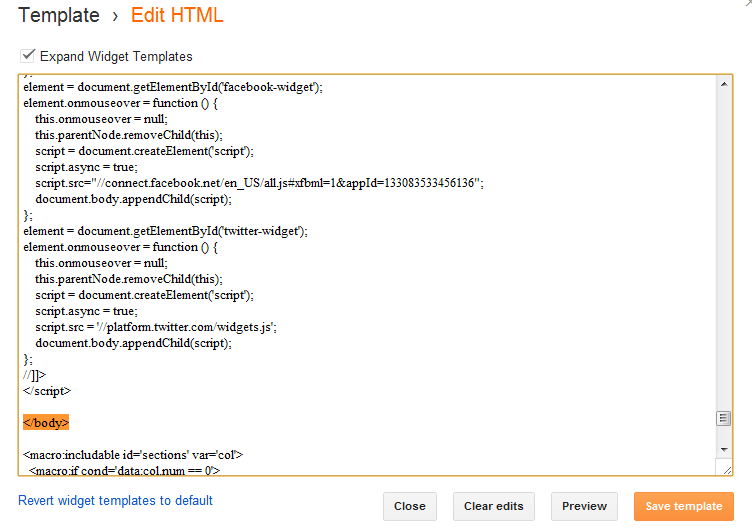
Note: In Line 4 Replace the URL with your blog Address and In Line 15 and 16 replace instance of stylifyyourblog with your RSS Feed Name
3. Now search for </body> tag and add the following code just before it

<script src='http://ajax.googleapis.com/ajax/libs/jquery/1/jquery.min.js' type='text/javascript'></script> 
<script>
//<![CDATA[
var b = $("#SYB-Bar-Container");var c = b.css("top");$(window).scroll(function (){if ($(this).scrollTop() > 50){b.stop().animate({top: "0px"}, 0)}else{b.stop().animate({top: "-100px"}, 0)}});
//]]>
</script>
<script>
$(document).ready(function(){// fade in .btt
$(function () {$(window).scroll(function (){});// scroll body to 0px on click
$('.btt a').click(function () {$('body,html').animate({scrollTop: 0}, 350);return false;});});});
</script>
<script>(function(d, s, id) {var js, fjs = d.getElementsByTagName(s)[0];if (d.getElementById(id)) return;js = d.createElement(s); js.id = id;js.src = "//connect.facebook.net/en_US/all.js#xfbml=1";fjs.parentNode.insertBefore(js, fjs)}(document, 'script', 'facebook-jssdk'));</script>
<script src='http://apis.google.com/js/plusone.js' type='text/javascript'></script>
<script src='http://platform.twitter.com/widgets.js' type='text/javascript'></script>


Note: In case you have already included the jQuery library in your blog then remove Line 1 . The same applies for Line 12 ,13 and 14 as well if you have included Facebook , Google+ and Twitter scripts respectively.

4. Lastly add the following CSS just before ]]></b:skin> tag

#SYB-Bar-Container {
background-color:#f6f6f6;
background: -webkit-gradient(linear, 0% 40%, 0% 70%, from(#f9f9f9), to(#f1f1f1));
background: -moz-linear-gradient(linear, 0% 40%, 0% 70%, from(#f9f9f9), to(#f1f1f1));
}

#SYB-Bar-Container , #SYB-Bar-Left .Home a, #SYB-Bar-Right .btt a,.SYB-emailsubmit {
box-shadow: 0 5px 5px -5px #999;
-webkit-box-shadow: 0 5px 5px -5px #999;
-moz-box-shadow: 0 5px 5px -5px #999;
}

#SYB-Bar-Container{
margin: 0px 116px;
top:-100px;
-moz-border-radius:0px 0px 10px 10px;
-webkit-border-radius:0px 0px 10px 10px;
border-radius: 0px 0px 10px 10px;
text-align:center;
border-bottom: 1px solid #aaa;
z-index:999;
padding:4px;
height:33px;
position:fixed;
vertical-align: baseline;
}

#SYB-Bar-Container *{
padding:0;
}

#SYB-Bar-Container a {
text-decoration:none;
}

#SYB-Bar-Content{
width:1024px;
margin:0 auto;
}

#SYB-Bar-Content li{
list-style:none;
float:left;
}

#SYB-Bar-Left{
float:left;
width:45%;
}

#SYB-Bar-Right{
float:right;
width55%;
}

#SYB-Bar-Left li{
margin-right:1%;
margin-top:-7px;
}

#SYB-Bar-Right li{
margin-top:-7px;
}

#SYB-Bar-Left .Home a, #SYB-Bar-Right .btt a,.SYB-emailsubmit{
font-size:9pt;
font-family:cambria;
font-weight:Bold;
text-transform:uppercase;
color:#fff;
text-shadow:0 -1px 1px rgba(0,0,0,0.25);
letter-spacing: 1px;
padding:6px;
border-radius:3px;
-moz-border-radius:3px;
-webkit-border-radius:3px;
}

#SYB-Bar-Left .Home a:active, #SYB-Bar-Right .btt a:active,.SYB-emailsubmit:active{
position: relative;
top: 1px;
box-shadow:none;
}

#SYB-Bar-Left .Home a{
background:#143eb4;
}

#SYB-Bar-Left .Home a:hover{
background:#1556fa;
}

#SYB-Bar-Right .Subscribe{
margin-top:-14px;
}


#SYB-Bar-Right .btt a{
background:#00810b;
margin-left:3px;
}

#SYB-Bar-Right .btt a:hover{
background:#06b421;
}

.SYB-emailsubmit{
background:#ce1527;
cursor:pointer;
border:none;
height:26px;
width:90px;
}
.SYB-emailsubmit:hover{
background: #f02a37;
}
.textarea{
border:1px solid #aaaaaa;
-moz-border-radius:3px;
-webkit-border-radius:3px;
border-radius:3px;
resize:none;
font-size:8pt;
font-family:verdana;
width:170px;
height:25px;
color:#000000;
}

#share-top{
background: #f9f9f9;
border:1px solid #dddddd;
line-height: 1;
margin: -4px 0 0 60px;
padding: 10px 0 2px 5px;
-moz-border-radius:3px;
-webkit-border-radius:3px;
border-radius:3px;
}

#share-top li {
display: block;
margin-right: 0;
}

#facebook-widget,#google-widget,#twitter-widget {display:none; }
@media only screen and (min-width : 768px) and (max-width : 1050px),only screen and (min-device-width : 768px) and (max-device-width : 1024px){
#SYB-Bar-Container{
display:none;
}
}


5. Hit the Save Template button and view your blog to see how the bar appears.


Thanks to Hacking University for creating this widget and also to Jafar Dhada insisting for creating a tutorial for this. In case you have any ideas for widgets or tutorials feel free to share them via comments
  • Slide to Top ↑

Lazy Loading Social Buttons for Blogger

tweet like +1
Social Sharing buttons are known for there bad effects on the page load speed. For some time I was trying to find a solution to this problem on lines of the Lazy Load Plugin for images , I was inspired by way Blogger Dynamic Views handled the problem , loading buttons styles and scripts on mouse-hover. Then I came across Taylor Fausak solution and did a bit of tweaking for making them work in Blogger.


Demo

Features 


  • Asynchronous loading of all resources on hover 
  • Minimal CSS for styling the fake buttons
  • Page Size reduction by 200KB+
  • All major social networks like Facebook , Twitter , Google+ supported 
  • Currently supports Single Instance per page


  • Video Tutorial


    Steps


    1. Go to Blogger Dashboard ,and go to Templates page of a blog


    new blogger dashboard


    2. Now click the Edit HTML button and tick the Expand Widget Preview option


    Edit HTML Blogger dashboard


    3. Search for ]]></b:skin> tag and add the following CSS before it


    .fb-like {display:inline !important;}
    #facebook-widget, .twitter-widget, .google-widget, .facebook-widget,#google-widget,#twitter-widget { color: #ffffff !important; display: inline-block; line-height: 22px; text-align: center; text-decoration: none;width: 55px;}
    #facebook-widget, .facebook-widget { background: #3b5b99; }
    #google-widget, .google-widget { background: #dd4b39; }
    #twitter-widget ,.twitter-widget {background: #33ccff;}


    CSS related to Lazy load sharing buttons


    4. Now search for the </body> tag and add the following JavaScript before it

    <script type='text/javascript'>
    //<![CDATA[
    var element, script ;
    element = document.getElementById('google-widget');
    element.onmouseover = function () {
    this.onmouseover = null;
    this.parentNode.removeChild(this);
    script = document.createElement('script');
    script.async = true;
    script.src = '//apis.google.com/js/plusone.js';
    document.body.appendChild(script);
    };
    element = document.getElementById('facebook-widget');
    element.onmouseover = function () {
    this.onmouseover = null;
    this.parentNode.removeChild(this);
    script = document.createElement('script');
    script.async = true;
    script.src="//connect.facebook.net/en_US/all.js#xfbml=1&appId=133083533456136";
    document.body.appendChild(script);
    };
    element = document.getElementById('twitter-widget');
    element.onmouseover = function () {
    this.onmouseover = null;
    this.parentNode.removeChild(this);
    script = document.createElement('script');
    script.async = true;
    script.src = '//platform.twitter.com/widgets.js';
    document.body.appendChild(script);
    };
    //]]>
    </script>

    scripts related to lazy load sharing buttons


    5. Now we have two options , either show the Social Share buttons on the Post Page only or on Index pages as well ( like Home Page , Label Page ).

    For Post Page Only

    Search for <div class='post-header-line-1'/> and add the following HTML just after it

    <div style="margin: 0px auto;text-align: center;" >
    <b:if cond='data:blog.pageType == &quot;item&quot;'>
    <a href="#" id='twitter-widget' >Tweet</a>
    <a class='twitter-share-button' data-count='horizontal' data-related="Your-Twitter-Handle" href='https://twitter.com/share'/>
    <a href="#" id='google-widget' >+1</a>
    <span class='g-plusone' data-size='medium'/>
    <a href="#" id='facebook-widget' >Like</a>
    <div class='fb-like' data-layout='button_count' data-send='false'/>
    </b:if>
    </div>


    html related to lazy load sharing buttons


    For Index Pages as well as Post pages

    In this implementation , there are fallback buttons for all the pages except the Post page. When clicked they will give a Popup of the respective default sharing option.
    Search for <div class='post-header-line-1'/> and add the following HTML just after it

    <div style="margin: 0px auto;text-align: center;" >
    <b:if cond='data:blog.pageType == &quot;item&quot;'>
    <a href="#" id='twitter-widget' >Tweet</a>
    <a class='twitter-share-button' data-count='horizontal' data-related="Your-Twitter-Handle" href='https://twitter.com/share'/>
    <a href="#" id='google-widget' >+1</a>
    <span class='g-plusone' data-size='medium'/>
    <a href="#" id='facebook-widget' >Like</a>
    <div class='fb-like' data-layout='button_count' data-send='false'/>
    <b:else/>
    <a class='twitter-widget' expr:href='&quot;http://twitter.com/share?url=&quot; data:post.url &quot;&amp;text=&quot; data:post.title' onclick='javascript:window.open(this.href, &quot;bloggerPopup&quot;, &quot;toolbar=0,location=0,statusbar=1,menubar=0,scrollbars=yes,width=550,height=500&quot;); return false;'>Tweet</a>
    <a class='google-widget' expr:href='&quot;https://plus.google.com/share?url=&quot; data:post.url' onclick='javascript:window.open(this.href, &quot;bloggerPopup&quot;, &quot;toolbar=0,location=0,statusbar=1,menubar=0,scrollbars=yes,width=550,height=500&quot;); return false;'>+1</a>
    <a class='facebook-widget' expr:href='&quot;http://www.facebook.com/share.php?u=&quot; data:post.url &quot;&amp;title=&quot; data:post.title' onclick='javascript:window.open(this.href, &quot;bloggerPopup&quot;, &quot;toolbar=0,location=0,statusbar=1,menubar=0,scrollbars=yes,width=550,height=500&quot;); return false;'>Like</a>
    </b:if>
    </div>

    6. Hit the Save Template button

    Some Things to Take Care

    You can extend this script for other social sharing buttons like LinkedIn ,Pinterest ,Digg , etc

    For it to work effective ,make sure to all scripts related to Social Media buttons are removed from your template

    There is lot of scope for improvement here specially for multiple instance on a single page. I will be doing a followup tutorial soon, till then feel free to ask any difficulties you face while implementing this in the comments below

    Star Ratings in Blogger using JS-Kit

    star ratingsStar Ratings are graphical representation of the likability of a post generally measured on the scale of 5 and represented by stars. This can act as a useful alternative for collecting information about the likability of posts as many readers shy away from leaving comments. Not only is it faster than commenting also there is a added element of anonymity. In this tutorial we will be learning how to embed JS-Kit star rating in Blogger and some handy tricks related to it


    Demo

    Before we get started

    We will be using the Old Interface for this tutorial as the New Interface throws up unexpected errors when editing the template. In case you are one of the people who joined Blogger recently then there might be a chance that you have no access to the Old Interface. To overcome this problem , type the following URL into the address bar

    blogger URL

    Replace the highlighted number with your Blog's ID . To find the Blog ID , observe the Address Bar while surfing through the Stats , Layout , Template pages of your Blog . You will see a similar large number . That would be your Blog ID


    Video Tutorial


    Steps

    1. Go to Blogger Dashboard and open up the Design Tab of the blog in which you want to add the Star Ratings

    Blogger Dashboard Old

    2. Now click the Edit HTML button and tick the Exapnd Widget Preview option

    Edit HTML Old Blogger Dashboard

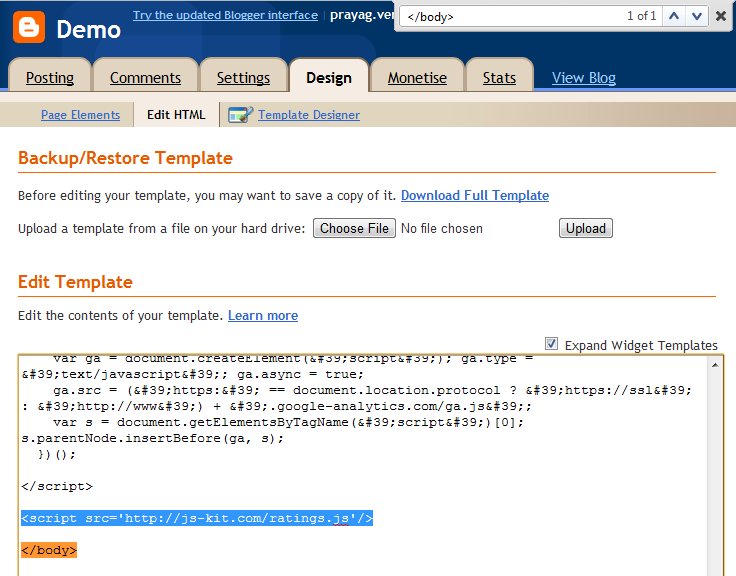
    3. Now search for <div class='post-header-line-1'/> and add the following code just after it

    <div class='js-kit-rating' expr:path='data:post.url' expr:permalink='data:post.url' expr:title='data:post.title'>
    </div>


    JS-Kit related HTML

    4. Now search for </body> tag and add the following code just before it

    <script src='http://js-kit.com/ratings.js'/> 

    JS Kit rating script


    5. Lastly add the following CSS just before ]]></b:skin> tag

    .js-kit-rating {
    height:45px;
    text-indent: -9999px;
    overflow:hidden;
    text-indent: -9999px;
    width:85px !important;
    }


    js kit ratings related css

    6. Hit the Save Template button and view your blog to see where the ratings widget appear

    Some handy tricks

    Removing Attribution

    js kit ratings attribution


    As you might have observed ,when you hover over the Ratings , there appears a attribution just besides it , to remove it add the following CSS

    .js-kit-rating {
    height:45px;
    overflow:hidden;
    width:85px !important;
    }


    Removing Total votes text


    js kit ratings votes text


    By default under the ratings , the total numbers of votes cast are shown , to remove it add the following CSS

    .js-kit-rating {
    height:45px;
    text-indent: -9999px;
    overflow:hidden;
    width:85px !important;
    }


    Showing the Thumbs Style

    Thumbs Up Thumbs Down


    In case you are a fan of the Thumbs up , Thumbs down style of rating ,then replace the code in the Step 3 above by the following code

    <div class='js-kit-rating' view="score"  expr:path='data:post.url' expr:permalink='data:post.url' expr:title='data:post.title'>
    </div>


    Feel free to share any tricks or problems that you face while implementing this Rating widget. Blogger also has a inbuilt Rating system , I will be doing a tutorial about it soon

    Google Web Fonts in Blogger

    web fonts

    Web fonts have been around since the CSS2 specification came out ,but in the recent years there has been a huge adoption due to lots of services coming up to cater to the users needs. One of the first on the scene was Typekit and was followed by lots of others. But they were all paid services and hence out of reach of the many ,then came Google Web Fonts and rest is history. Not only was it free but being hosted at Google's servers it was the most reliable of them all. In this tutorial we will learn how to embed Google Web Fonts in Blogger .


    Getting started
    There are mainly two ways to embed Google Web Fonts into your blog , firstly you can simply use the Template Designer or you can include the specific font related Style-sheet directly to your template .


    Using the Template Designer


    Video Tutorial 


    Steps

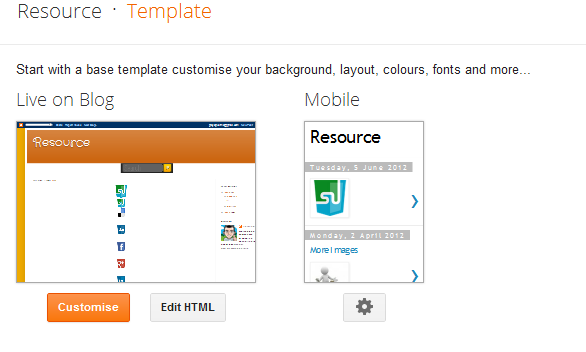
    1. In your Blogger Dashboard ,go to the Template page of the specific blog

    blogger dashboard

    2. Click the Customise button present just adjacent to the Edit HTML button

    blogger dashboard template page

    3. In the Template Designer , go to the Advanced Tab and you are now free to select the fonts for the various parts of your blog like Page Text , Blog Title ,etc

    New Blogger Template Designer

    Cons
    - You don't have access to all the fonts present in the Google Web Fonts Directory. Only a selected few are included in the Blogger's Template Designer

    - An extra bit of JavaScript is added which is way more than the simple stylesheet added in the other method
    <script type="text/javascript">
    if (navigator.userAgent.indexOf('MSIE 6') == -1) {
    WebFontConfig = {
    google: { families: [ 'Pacifico' ],
    api: 'http://themes.googleusercontent.com/fonts/css?kit=YwEG9hvZkp55xA2jQoejfg'
    },
    loading: function() {
    if (window.jstiming) window.jstiming.load.tick('webfontLoading');
    },
    active: function() {
    if (window.jstiming) window.jstiming.load.tick('webfontActive');
    }
    };
    (function() {
    var wf = document.createElement('script');
    wf.src = '//ajax.googleapis.com/ajax/libs/webfont/1/webfont.js';
    wf.type = 'text/javascript';
    wf.async = 'true';
    var s = document.getElementsByTagName('script')[0];
    s.parentNode.insertBefore(wf, s);
    })();
    } else {
    document.documentElement.className = 'wf-inactive';
    }
    </script>


    -This might not work if you are using a highly customized template the reason being the template designer would have removed the necessary CSS variables required for this to work. If you facing this problem then follow the other method below

    Pros
    - Simple to implement

    - Surprisingly faster than the other method even though extra JavaScript is added

    The Style-Sheet method

    This requires a bit of fiddling with the Edit HTML of the Blog but is the cleaner of the two. I suggest that you follow this method

    Video Tutorial 


    Steps

    1. Go to Google Web Fonts and browse through the various fonts . Once you have selected which font to use , click the Quick Use Button just in the right hand side.

    Google Web Fonts select

    2. Now scroll down a bit and you will see a link tag code , copy this code

    Web Fonts CSS copy

    3. Now in the Blogger Dashboard ,go to the Template page of the specific blog

    Blogger dashboard

    4. Click the Edit HTML button present just adjacent to the Customise button

    Edit HTML Blogger

    5. Paste the code you copied just after the <head> tag

    Font before b:skin tag

    6. Now to add the CSS to use this font, just before the ]]></b:skin> tag

     h1 {
    font-family: THE-WEB-FONT-FAMILY-NAME-YOU-EMBED ;
    }


    Embedding fonts is now a easy task, just don't overdo it, can have some negative effects Feel free to ask problems or questions related to this tutorial in the comments below

    Related Post Widget for Blogger using OutBrain


    You Might LikeRelated Posts are conventionally shown at the end of a article to present interested readers with a choice of reading other similar stories to the one they just read. In Blogger there are no official widget for this purpose so you will have to rely on third party services or a simple JavaScript hack. In this post we will be discussing a step-by-step guide on how to integrate the OutBrain Related posts widget into your blog. Also with a bit of CSS we will make them look better.


    Lets get started: 


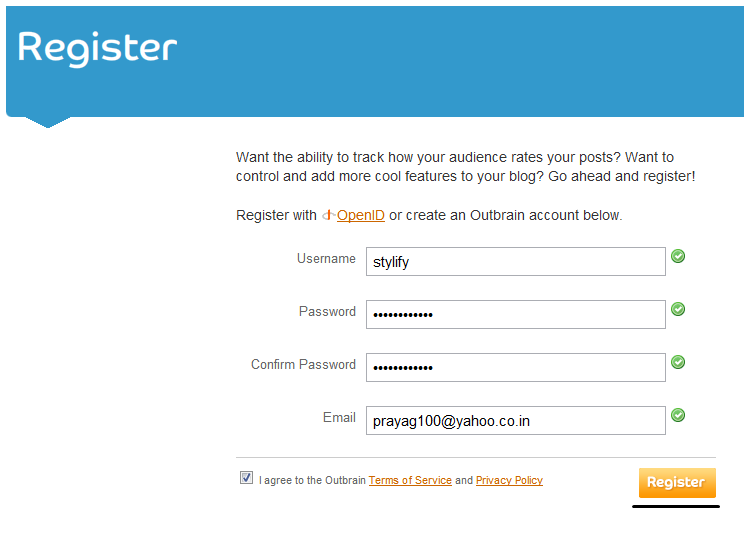
    1. Go to Outbrain.com and click the Register button on the upper right.


    outbrain homepage

    2. On the Registration page ,add all the relevant details and click the Register button 


    outbrain registration page

    3. Now you will be asked to confirm your email 


    outbrain confirmation page

    4. After confirming you will be redirected to the Dashboard , here in the left side, select the Manage Blog option and after that click the Add a Blog button 


    outbrain add a blog


    5. Now you will be asked information about your blog ,its platform (In this case set it to Blogger ) , its URL ,language ,etc.

    outbrain select a platform

    Note: Make sure to set the Install widget option to Yes

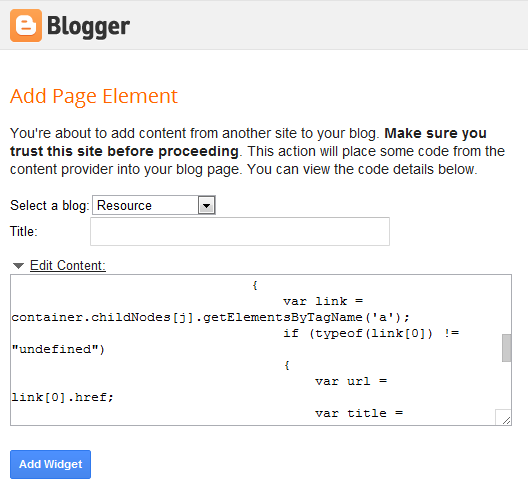
    6. After clicking the Continue button you will be presented with a option to Add the widget to your blog. Select your blog and click the Add Widget button 

    Pro Tip: By default the widget is added to all the pages in your blog including your HomePage. In case you want the widget to only appear in the Post pages then add the following code in the Edit Template option as shown in the image below

    <b:includable id='main'>
    <b:if cond='data:blog.pageType == "item"'>
    <data:content />
    </b:if>
    </b:includable>

    add widget to blogger

    7. The widget is installed but you will have to wait around 3-4 hours for OutBrain to index your posts and then only will they start displaying in below your a blog posts. Until then you can customize your widget by going to the Outbrain Dashboard > Manage Blog > Settings ( of the blog )

    outbrain settings page

    Enhancements 

    The widget you added gives such a formal and dull look which will in no way interest readers to click on these links. Lets Stylify it a bit using some CSS ! 


    Rounded Edges
    The square shapes are a bit too standard , lets round things up

    #ob_strip_container_rel_0_stripBox .strip-rec-link-img , #ob_strip_container_rel_0_stripBox .strip-img {border-radius: 100px !important;}


    Removing attribution
    Under each widget a link is added to the Outbrain service. To remove it add

    .what_is_container{display:none !important;}


    Changing Title Font 
    The "You might Like" font is a standard font , you can easily change it to another font by
    .strip-like {
    font-family: FONT-OF-YOUR-CHOICE ;
    font-weight: normal !important;
    }

    Adding background

     As you might observe that I have added a background to this blogs related post widget , you can do the same with the following
    #outbrain_widget_0 {
    background: url('https://blogger.googleusercontent.com/img/b/R29vZ2xl/AVvXsEgnlnu3GmIkr3mGMrF3SrX4iz8a8dTcNqMr-DMCWIbGVFdbL7YsxM3VTUFRWmO2p4Hy-ecsEJSUEFfDalnN-ooYoR4tgXqE4zubO1GqLftXFkBmLkTTb1LbIcSwP7rEySz48oSQc2pOsjGe/s1600/pattern.png');
    }

    Note: You might have to adjust the background a bit using padding and margin CSS property to make sure that it aligns well .

    Over to you
    Facing any problems while implementing this widget or have some nice trick to share. Feel free to ask/share them using the comments below

    The Official Google+ Stream Widget

    Google+ streamThe much awaited Google+ Stream Widget for Blogger and other platforms is on the way. It has not been made public yet but there is a working Demo present in one of the Blogger employee's blog which I stumbled upon by chance. Its not ready for a public release yet as the profile thumbnails of users are not working correctly . This widget uses the Blogger API for its implementation but this can be easily integrated into any other platform with a simple Iframe.


    Here is a YouTube Video with the Demo

    The Code
    <script type="text/javascript">
    if (!window.gadgets || !gadgets.rpc) {
    document.write('<script type="text/javascript"'
    'src="//www-blogger-opensocial.googleusercontent.com/gadgets/js/rpc.js?container\x3dblogger\x26nocache\x3d0\x26debug\x3d0\x26c\x3d1\x26v\x3dea8289bd3846c57bd64db8aa8a3f2928\x26sv\x3d9">'
    '</scr' 'ipt>');
    }
    </script>
    <script type="text/javascript">

    function registerGetBlogUrls() {
    gadgets.rpc.register('getBlogUrls', function() {
    var holder = {};


    holder.postFeed = "http://www.blogger.com/feeds/2295610366269213074/posts/default";


    holder.commentFeed = "http://www.blogger.com/feeds/2295610366269213074/comments/default";

    holder.currentBlogUrl = "http://www.stylifyyourblog.com/";
    holder.currentBlogId = "2295610366269213074";

    return holder;
    });
    }
    </script>
    <script type="text/javascript">
    if (!window.registeredCommonBloggerCallbacks) {
    window.registeredCommonBloggerCallbacks = true;

    gadgets.rpc.register('resize_iframe', function(height) {
    var el = document.getElementById(this['f']);
    if (el) {
    el.style.height = height 'px';
    }
    });


    gadgets.rpc.register('set_pref', function() {});

    registerGetBlogUrls();
    }
    </script>
    <iframe src="//www-blogger-opensocial.googleusercontent.com/gadgets/ifr?url=http://gadgets-dev.appspot.com/static/googleplus/googleplus.xml&amp;container=blogger&amp;view=default&amp;lang=en&amp;country=ALL&amp;sanitize=0&amp;v=4a1aace2d5086225&amp;libs=core:setprefs&amp;parent=http://www.stylifyyourblog.com/&amp;up_userid=107070768564947881700&amp;mid=1#up_userid=107070768564947881700&amp;st=e%3DAFlCd0VF42RtsdEa50ZMThptAqYoiY%252BtiUhop4spI1D7lHNmW54jZGVNkAqmkOmzdiOCjtvp%252FoBuUthqBTlKd%252BM%252BjJVjk%252FsVBV5OCbVMo5ms9ao7aBBuv1VXpj5o6FiltBEZpXpVdMLN%26c%3Dblogger&amp;rpctoken=3600249869607945918" frameborder="0" style="width: 100%; display: block" height="422" id="sidebar-gadget1" name="sidebar-gadget1"></iframe>
    <script type="text/javascript">
    gadgets.rpc.setRelayUrl("sidebar-gadget1", '//www-blogger-opensocial.googleusercontent.com/gadgets/files/container/rpc_relay.html');
    gadgets.rpc.setAuthToken("sidebar-gadget1", "3600249869607945918");
    </script>
    </div>


    As you will observe in first few lines ,it is using the Blogger API for getting the Blog ID and URL . After that a iFrame is included ( Line 47 ) which is the Widget itself.

    All Blogger API widgets use IFrames for implementation and this is no different.
    After a bit of research I came to across a XML file which contained the information about the author of this widget inside Google.


    You can check the XML file here http://gadgets-dev.appspot.com/static/googleplus/googleplus.xml

    Demo


    Implementing it

    You can easily implement this using the following code in your websites ( its pretty long code ! ).
    <iframe src="//www-blogger-opensocial.googleusercontent.com/gadgets/ifr?url=http://gadgets-dev.appspot.com/static/googleplus/googleplus.xml&amp;container=blogger&amp;view=default&amp;lang=en&amp;country=ALL&amp;sanitize=0&amp;v=4a1aace2d5086225&amp;libs=core:setprefs&amp;up_userid=107070768564947881700&amp;mid=1#up_userid=107070768564947881700&amp;st=e%3DAFlCd0VF42RtsdEa50ZMThptAqYoiY%252BtiUhop4spI1D7lHNmW54jZGVNkAqmkOmzdiOCjtvp%252FoBuUthqBTlKd%252BM%252BjJVjk%252FsVBV5OCbVMo5ms9ao7aBBuv1VXpj5o6FiltBEZpXpVdMLN%26c%3Dblogger&amp;rpctoken=3600249869607945918" frameborder="0" style="width: 100%; display: block" height="422" id="sidebar-gadget1" name="sidebar-gadget1"></iframe>


    To display your Profile stream , just search for the word userid in the above code , it will look something like this


    Just replace the highlighted number above with your Google+ Profile ID

    Somethings to Remember

    This widget has not been officially released and might experience some unexpected problems. Other than that feel free to ask any problems that you come across while implementing it in your blog/websites.

    Link building has always been a social game

    link building people
    There has been plenty of buzz lately in the seo community about how social factors are going to take over from links when it comes ranking a website. How true this is we are yet to see but what many people forget is that link building has always been a social activity anyway, that’s because in order to get a good link you have to deal with real people. If you can get a link without a real person approving it in some way then it’s probably worthless since everyone will be exploiting it.


    Usually the link building process starts out with some sort of contact with another webmaster and it’s usually in the form of an email. The thing is if a webmaster has a quality site then they probably get hundreds of standard “out of the box” link requests every month all starting with “Dear website owner”. If you can’t say something unique in your contact email then how likely is it that your website has anything worth linking to?

    Follow the rules and get results

    Many webmasters who do accept guest posts have specific requirements for the content that they will accept, i.e. it may have to be a certain length, on a specific topic or come with photos etc. The point is that whatever they are asking for you need to give them that and more, it’s their site after all and why should they accept less? When you show you’ve spent some time to deliver what’s really required then you can stand above a crowd of hundreds of other requests. My main point is that you want to make it as easy as possible for the target webmaster to put up your link, when there is a quality link at stake its always worth putting in the effort. Every week in the webmaster world there seems to be a new “system” for building automated links and I think this has made the idea of spending a few hours to get one link strange to webmasters.

    Many link builders have embraced the concept of sending out thousands of emails to random sites in the hope that just a few people will reply. This has never made sense to me as just a few well targeted contacts to webmasters who are looking for content right now can be much more time and cost effective. For example a great place to find webmasters who want quality content today is myblogguest, here you have webmasters who get the concept already and if you can give them exactly what they want you can have a link up fast. I’ve spent so much time emailing random people and often you spend more time explaining why a link swap/guest post is beneficial to both parties than creating the actual content. Quality over quantity is important when it come to requests as well as the actual link received.

    Find people who are active now!

    Getting in contact with a real person also lets you know that the blog/site is active and open to the idea of giving you a link. There are so many dead (or dying) sites on the web where any contact made effectively going no-where, you need to filter these places out by looking for the social signals that the webmaster is interested now, i.e. a forum post or facebook status. I have to admit I have quite a few sites I am no longer interested in working on too but this wouldn’t be obvious if you just landed on the homepage.

    So as mentioned the right social skills are important with it comes to links as there is always a person in control at the end of any potential request. But if you can give that person exactly what they are looking for then you make the whole process easier for everyone. I hope this article has helped if you’re trying to promote your site online.

    This is a guest post by Paul who teaches people how to earn money using the net.

    Building Relationships With Other Bloggers


    relationship
    You've got a great perspective on something interesting and your blog is gaining popularity as a result. You're an expert and your writing style is informative and entertaining and people are beginning to talk about what you're doing. The last thing you want to do is partner up with other bloggers, right? Actually, it's a natural step in the evolutionary process of successful blogs.


    Using Your Expertise to Build Readership

    share your expertise  What if your expertise is helping international travelers understand the visa and customs requirements for their countries of destination? Understanding every requirement for gaining entry into and visiting a foreign country can be confusing for many travelers. It's never presented in plain language and there are frequent questions about the nature of the visit.

    Expertise in helping travelers answer their specific questions is valuable to many people. Your blog will be talked about and shared among friends and family, and you’ll see your visitor count increase. But once they've had their questions answered, will they come back? Have you given them any reason to do so?


    Joining Forces With Other Bloggers

    Join Forces bloggers What if you found a travel writer or journalist with their own successful blog and joined forces? Your joint efforts, through links, shared content, and collaborative articles, will provider travelers with complete information on the policies and procedures as well as what to expect culturally upon arrival at their destination.

    Invite readers to come back to the blog to share their travel experiences, which give them the reasons to come back. Repeat traffic from travelers who are inclined to pass along information will only serve to make your combined blog a much more important feel.


    What if found an independent travel agent and asked them to become an important part of the new and improved blog? Now you're providing three "hands-on" services to travelers. Direct contact through the blog with a personal travel agent is a real value-add for consumers, paired with the other two services already provided, has created a concierge travel service with a growing and loyal clientele.

    Creating natural relationships with other bloggers, the kind that serve as logical extensions of what you're already doing, can serve to expand the reach and importance of your blog in ways not previously considered. Each person you reach has an interest in the information you're providing them, and in any number of other things that may be related. The more people you can reach the more synergy and potential new avenues not even imagined just weeks prior.

    Growth through partnering is as old as commerce itself. Be open to opportunities to expand your reach, and at the same time be thinking about ways to get in front of more readers and contributors. The combination could set your apart from your would-be competition.

    How has your blog strengthened through partnerships with other bloggers?


    About the Author: Lisa is a full time blogger for Satellitetv.com, and is a regular contributor at Celebutaunt.net. When she isn’t blogging, she loves to garden with her cat Oreo.
     
    © 2009 Blogger Tips 2013 | Powered by Blogger