 Its been nearly 3 months since the Stylify template. Now I am presenting my second template named Standardized. It has its roots in responsive design and has some awesome features like threaded Reply comment & eye-catching Header design. A mix of design and usability.
See Demo
Download

Initially I started making this template with the goal to make it W3C valid. Thats where the name Standardized came from, the one that follows standards. Near the end of process I hit a really nasty cross-browser issue (a.k.a. IE sucks) , and by just 1 error this template remained from obtaining that "VALID" markup title. This is just version 1 and better onces are to come. The highlight of this template is the Nested Reply comment feature inside the Blogger comment system itself! A really amazing hack...
Features
-Responsive design (No horizontal scrollbar till 580px)
-Cross browser compatibility
-Page Navigation
-Widgets ready sidebar
-Its own Related Post widget
-Stylish commenting system with comments having gradient background style
-Attractive Post Title
-jQuery and CSS3 powered Header design
-Four column footer
-Threaded Reply feature for Blogger Comment system
-Eye-catching Sidebar Design
-Search Engine Optimized
-Near W3C Valid
-90%+ Google Page Speed score
How to configure some of the Features:
1.Menu
The code for the menu widget has been separately included in the Download Package. Rather than integrating it into the Template and making it difficult to edit ,I have included it separately. All the styles are included beforehand just the Links have to be copied in. The menu should be in the section of the Header (being just below the Header).
2.Page Navigation
To change the number of posts to be shown on using pagination find the term postperpage ( Using CTRL+F ) ,There will be a script something like this
<script type='text/javascript'>
var home_page="/";
var urlactivepage=location.href;
var postperpage=3;
var numshowpage=6;
var upPageWord ='Previous';
var downPageWord ='Next';
</script>
You can change the number values as you like in the above code.
var postperpage=9; → Changes the no of posts that will show up on clicking any page number.
var numshowpage=3;→ Changes the number of linking to show in the widget
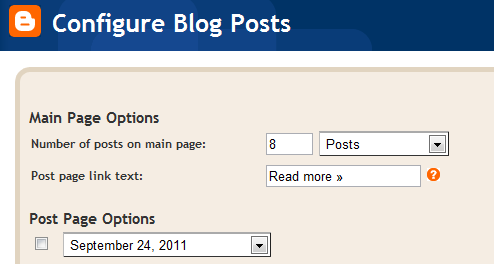
Note: Make sure that you also set the value of Number of Posts on Main Page (Go to Design > Page Elements , Click on Edit option of Blog Post and then Number of posts on main page: ) to same as that of the postperpage value.
3.Enabling Reply option for the comments
The the reply option in the comment will have to enabled . Just search for the term blogid= ( using CTRL+F ) with "Expand Widget Preview" option ticked. Below it you will see "blogID=XXXXXXXXXXXX" replace this XXXXXXXXXXX number with your Blog's ID. [To find your Blog's ID just Open Design Tab and in the Address bar of your browser there will be a very long number , just paste that here]
4.Social Media Buttons and Search Box
The Download package also contains code for these two widgets. Either you can put them in separate widgets or put them together. In case you put them together then make sure the search box is above the icons and also include it in the section just below the Header (In Page Elements/Layouts). The widget containing the Social Media Icon should always be in this section.
This template came in the wake of many users complaining about different problems in the previous template.
Liked My Work ?


0 comments:
Post a Comment