
A new Blogger template named Stylify v2 . It is quite similar to the current design of the blog. The aim was to minimize the use of JavaScript and instead use CSS to meet the needs. It has a simple design and is ultra optimized for Fast Loading (Given that you don't add 1000 extra widget ! ). The default Blogger Style-sheet has been removed to fasten it up even more. The SEO part is also taken care for with automatic Meta Description facility. Its a uncomplicated template with emphasis on Speed and Style.
See Demo
Download
Full Screenshot

Features
- Cross browser compatibility
- Responsive Design
- Page Navigation
- Lazy Loading Share Buttons
- Its own Related Post widget
- Stylish commenting system
- Attractive Post Title
- Four column footer
- Eye-catching Sidebar Design
- Search Engine Optimized
- 97% Google Page Speed Score
- In-built Author Bio Box
- CSS3 powered Buttons
- Breadcrumbs
- A fancy Label Widget
- Built-in simple Menu
- Automatic Meta Description for each post
- Use of fonts like Salsa and Electrolize
1. Menu

Extra Note: When you will install the template you will also see a Date above the post title and also the default Blogger sharing buttons . To remove them go to Layouts and edit the Blog Post widget. Untick the Date and Sharing button option and save.
2. Pagination
To change the number of posts to be shown on using pagination find the term postperpage ( Using CTRL+F ) ,There will be a script something like this
<script type='text/javascript'>
var home_page="/";
var urlactivepage=location.href;
var postperpage=3;
var numshowpage=6;
var upPageWord ='Previous';
var downPageWord ='Next';
</script>
You can change the number values as you like in the above code.
var postperpage=9; → Changes the no of posts that will show up on clicking any page number.
var numshowpage=3;→ Changes the number of linking to show in the widget

Note: Make sure that you also set the value of Number of Posts on Main Page (Go to Design > Page Elements , Click on Edit option of Blog Post and then Number of posts on main page: ) to same as that of the postperpage value.
3. Border of Image
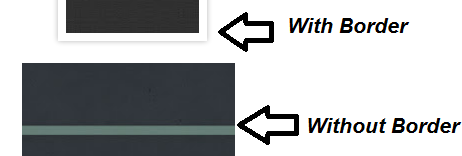
<img class="thumb" src="image.png" />
4. Using the CSS3 Button

<a href="URL" class="buttons button" >A Link<a/>
5. The Author Bio Box

6. Label Style

See Demo
Download
Whats your opinion about the template ? In case you face any problem or like to suggest any improvement feel free to do so via comments


0 comments:
Post a Comment