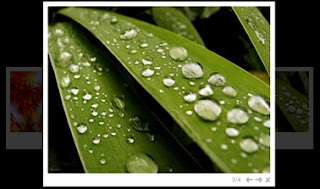
 Foxibox is a very small and easy program for a nice image gallery. It is designed to be easily integrated and just working fine.
This program is under GNU General Public License v3. It was developed with jquery 1.3.2 but works from 1.2.5.
Steps to Add it to Blogger:
1.Login to the Blogger account.
2. Now Go to Design > Edit HTML.
3.Now search for the </head> tag and paste the following code just Above/Before it.
<style type="text/css">Now search for the </body> tag and paste the following code just Above/Before it.
@import url(http://dl.dropbox.com/u/27675057/Foxibox/jquery-foxibox-0.2.css);
</style>
<script type="text/javascript" charset="utf-8" src="http://ajax.googleapis.com/ajax/libs/jquery/1.3.2/jquery.min.js"></script>
<script type="text/javascript" charset="utf-8" src="http://dl.dropbox.com/u/27675057/Foxibox/jquery-foxibox-0.2.min.js"></script>
<script type="text/javascript">Include all the images in a div tag with id pics like this
$(document).ready(function(){
$('#pics a').foxibox();
});
a2a_linkname = document.title;
</script>
<div id="pics">'#pics' and id="pics" are changeable to any name of your choice
.
.
.
.
</div>
2.Go to the Post/Page you want to add FoxiBox and go to Edit HTML tab .
3.Now copy the code from below and paste it there.
<style type="text/css">
@import url(http://dl.dropbox.com/u/27675057/Foxibox/jquery-foxibox-0.2.css);
</style>

<script type="text/javascript" charset="utf-8" src="http://ajax.googleapis.com/ajax/libs/jquery/1.3.2/jquery.min.js"></script>
<script type="text/javascript" charset="utf-8" src="http://dl.dropbox.com/u/27675057/Foxibox/jquery-foxibox-0.2.min.js"></script>
<script type="text/javascript">
$(document).ready(function(){
  $('#pics a').foxibox();
});
a2a_linkname = document.title;
</script>
<div id="pics">
.
.
.
.
</div>
'#pics' and id="pics" are changeable to any name of your choice
4.Now for adding the images into FoxiBox ,Firstly add the image normally using Insert Image button
Now When you see the code in the edit HTMLwindow it would be something like this
| <a href=" large3.jpg"=""><img border="0" height="90" src="/small3.jpg" width="120" /></a> |
Make it like this
| <a href=" " rel="[Name]" ><img src=" " /></a> |
As you can see we added only a rel="[Name]".
To Add Gallery ,this is the code
<a href=" " rel="[GalleryName]" ><img src=" " /></a> |
All the code should be included in the div tag with the id as mentioned in the snippet.
5.Now save the Post/Page and see the magic.
Note: Please Host all the files on free hosting service like DropBox or Blogspot itself !
Another Important thing to note is that all the images used in this tutorial like Next button ,Previous button ,etc are all hosted on Google Code service which are the fastest and most reliable servers on the internet with the least downtime.So you can easily implement this with no hassles for Image Hosting.
Another Important thing to note is that all the images used in this tutorial like Next button ,Previous button ,etc are all hosted on Google Code service which are the fastest and most reliable servers on the internet with the least downtime.So you can easily implement this with no hassles for Image Hosting.


0 comments:
Post a Comment