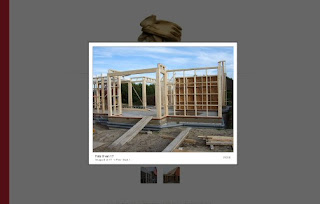
 ThickBox is a webpage UI dialog widget written in JavaScript on top of the jQuery library. Its function is to show a single image, multiple images, inline content, iframed content, or content served through AJAX in a hybrid modal. It is outdated now.
Some of its Features are:
ThickBox will resize images that are bigger than the browser window.
ThickBox offers versatility (images, iframed content, inline content, and AJAX content).
ThickBox will hide form elements in Windows IE 6.
ThickBox will remain centered in the window even when the user scrolls the page or changes the size of the browser window. Clicking an image, the overlay, or close link will remove ThickBox.
Steps to Add it to Blogger:
1.Login to the Blogger account.
2. Now Go to Design > Edit HTML.
3.Now search for the </head> tag and paste the following code just Above/Before it.
<script src="http://dl.dropbox.com/u/27675057/Thickbox/jquery-latest.pack.js" type="text/javascript"></script>
<script src="http://dl.dropbox.com/u/27675057/Thickbox/thickbox-compressed.js" type="text/javascript"></script>
<link rel="stylesheet" type="text/css" href="http://dl.dropbox.com/u/27675057/Thickbox/thickbox.css"  />
2.Go to the Post/Page you want to add the ThickBox and go to Edit HTML tab .
3.Now copy the code from below and paste it there.
<script src="http://dl.dropbox.com/u/27675057/Thickbox/jquery-latest.pack.js" type="text/javascript"></script>
<script src="http://dl.dropbox.com/u/27675057/Thickbox/thickbox-compressed.js" type="text/javascript"></script>
<link rel="stylesheet" type="text/css" href="http://dl.dropbox.com/u/27675057/Thickbox/thickbox.css"  />
4.Now for adding the images into ThickBox, Firstly add the image normally using Insert Image button
Now When you see the code in the edit HTMLwindow it would be something like this
| <a href=" large3.jpg"=""><img border="0" height="90" src="/small3.jpg" width="120" /></a> |
Make it like this
| <a href=" " class="thickbox" ><img src=" " /></a> |
For making a Gallery ,add a similar rel tag to every member of the gallery
Some Example Code
Single
<a href="http://dl.dropbox.com/u/27675057/1%282%29.jpg" title="add a caption to title attribute / or leave blank" class="thickbox"><img src="http://dl.dropbox.com/u/27675057/1%20%5B320x200%5D.jpg" alt="Single Image"/></a>
Gallery
<a href="http://dl.dropbox.com/u/27675057/1%282%29.jpg" title="add a caption to title attribute / or leave blank" class="thickbox" rel="gallery-plants"><img src="http://dl.dropbox.com/u/27675057/1%20%5B320x200%5D.jpg" alt="Plant 1" /></a>
<a href="http://dl.dropbox.com/u/27675057/2.png" title="add a caption to title attribute / or leave blank" class="thickbox" rel="gallery-plants"><img src="http://dl.dropbox.com/u/27675057/2%20%5B320x200%5D.png" alt="Plant 2" /></a>
<a href="http://dl.dropbox.com/u/27675057/3%20%282%29.jpg" title="add a caption to title attribute / or leave blank" class="thickbox" rel="gallery-plants"><img src="http://dl.dropbox.com/u/27675057/3%20%5B320x200%5D.jpg" alt="Plant 3" /></a>
Inline Content
<input alt="#TB_inline?height=300&width=400&inlineId=myOnPageContent" title="add a caption to title attribute / or leave blank" class="thickbox" type="button" value="Show" />
<div id="myOnPageContent">
<p>
Lorem ipsum dolor sit amet, consectetuer adipiscing elit, sed diam nonummy nibh euismod tincidunt ut laoreet dolore magna aliquam erat volutpat. Ut wisi enim ad minim veniam, quis nostrud exerci tation ullamcorper suscipit lobortis nisl ut aliquip ex ea commodo consequat.</p>
<p>
<select name=""><option>test</option></select></p>
</div>
iFrame
<a href="http://stylifyyourblog.blogspot.com/2011/06/adding-awesome-box-to-blogger.html?keepThis=true&TB_iframe=true&height=700&width=1280" title="add a caption to title attribute / or leave blank" class="thickbox">Example 1</a>
Ajax
<a href="http://dl.dropbox.com/u/27675057/ajaxTBcontent.html?height=300&width=300" title="add a caption to title attribute / or leave blank" class="thickbox">Scrolling content</a>
5.Now save the Post/Page and see the magic.
Note: Please Host all the files on free hosting service like DropBox or Blogspot itself!
Another Important thing to note is that all the images used in this tutorial like Next button ,Previous button ,etc are all hosted on Google Code service which are the fastest and most reliable servers on the internet with the least downtime.So you can easily implement this with no hassles for Image Hosting.
Another Important thing to note is that all the images used in this tutorial like Next button ,Previous button ,etc are all hosted on Google Code service which are the fastest and most reliable servers on the internet with the least downtime.So you can easily implement this with no hassles for Image Hosting.


0 comments:
Post a Comment