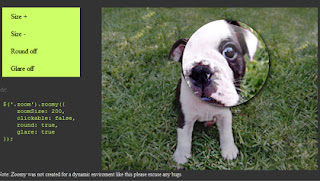
 Zoomy is a quick and easy plugin that will zoom into a picture. You just need to link a smaller image to a larger image. It could be with two differnt size images like most CMS systems create upon upload, or just recently added in ver. 1.1 you may use the same image just scaled down. The markup is a simple anchor ,linked to the large image, that wraps the smaller image. It takes only a little bit of scripting and your boring images pop of the page.
Steps to Add it to Blogger:
1.Login to the Blogger account.
2. Now Go to Design > Edit HTML.
3.Now search for the </head> tag and paste the following code just Above/Before it.
<script type="text/javascript" src="http://ajax.googleapis.com/ajax/libs/jquery/1.6.1/jquery.js"></script>
<script type="text/javascript" src="http://dl.dropbox.com/u/27675057/Zoomy/jquery.zoomy1.2.js"></script>
<style type="text/css">
@import url(http://dl.dropbox.com/u/27675057/Zoomy/zoomy1.2.css);
</style>
2.Go to the Post/Page you want to add Zoomy and go to Edit HTML tab .
3.Now copy the code from below and paste it there.
<script type="text/javascript" src="http://ajax.googleapis.com/ajax/libs/jquery/1.6.1/jquery.js"></script>
<script type="text/javascript" src="http://dl.dropbox.com/u/27675057/Zoomy/jquery.zoomy1.2.js"></script>
<style type="text/css">
@import url(http://dl.dropbox.com/u/27675057/Zoomy/zoomy1.2.css);
</style>
4.Now for adding the images into Zoomy ,Firstly add the image normally using Insert Image button
Now When you see the code in the edit HTMLwindow it would be something like this
| <a href=" large3.jpg"=""><img border="0" height="90" src="/small3.jpg" width="120" /></a> |
Make it like this
| <a href=" " class="zoom" ><img src=" " /></a> |
As you can see we added only a class="zoom"(The name of the class can be randomly chosen), Now add this snippet of Javascript to start Zoomy
<script type="text/javascript">These are the options available in Zoomy
$(function(){
$('.zoom').zoomy();
})(jQuery)
</script>
Here is a snippet to implement a customized Zoomy
<script type="text/javascript">
$('.zoomer').zoomy({
        zoomSize: 150,
        zoomText: 'click it',


        clickable: false,

    });
</script>
5.Now save the Post/Page and see the magic.


0 comments:
Post a Comment