 As asked by some of my readers, here’s a tutorial on how to add a Side Floating bar of social media buttons to a Blogger blog. I made it into a gadget, so you don’t have to go into your template HTML to install (or remove) them. Just drop the whole code into a HTML/Javascript gadget.
I have included Facebook Share, Tweet, Stumble, Delicious and Digg This buttons in the bar. Each of them comes with a live counter. These buttons are from ShareThis.com so you can track your shares easily too. There is also a added a functionality for closing this sidebar if your readers don't like it. You can add more social bookmarking or sharing buttons later if you wish.
Demo


Adding the Side Floating Buttons
1. Login to your Blogger account.
2. Go to Design > Page Elements.
3. Click Add A Gadget.
4. In Add A Gadget window, select HTML/Javascript .
5. Copy the code below and paste it inside the content box. (See how to Copy Easily)
<style>
#pageshare {position:fixed; top:25%; left:5px; float:left; border-radius:5px;-moz-border-radius:5px;-webkit-border-radius:5px;background-color:#f8f8f8;padding:0 0 2px 0;z-index:10;}
#pageshare .sbutton {float:left;clear:both;margin:5px 5px 0 5px;}

span.linkopacity {
filter:alpha(opacity=0.1);
-moz-opacity: 0.1;
opacity: 0.1;
-khtml-opacity: 0.1;}

span.linkopacity:hover {
filter:alpha(opacity=100);
-moz-opacity: 1.0;
opacity: 1.0;
-khtml-opacity: 1.0; }
</style>
<div style='margin-left: auto; margin-right: auto;'>

<span class='st_facebook_vcount' displaytext='facebook'/>
<span class='st_twitter_vcount' displaytext='tweet'/>
<span class='st_digg_vcount' displaytext='digg'/><center><span class='st_delicious_vcount' displaytext='save'/>
<span class='st_stumbleupon_vcount' displaytext='share'/></center>
</div>
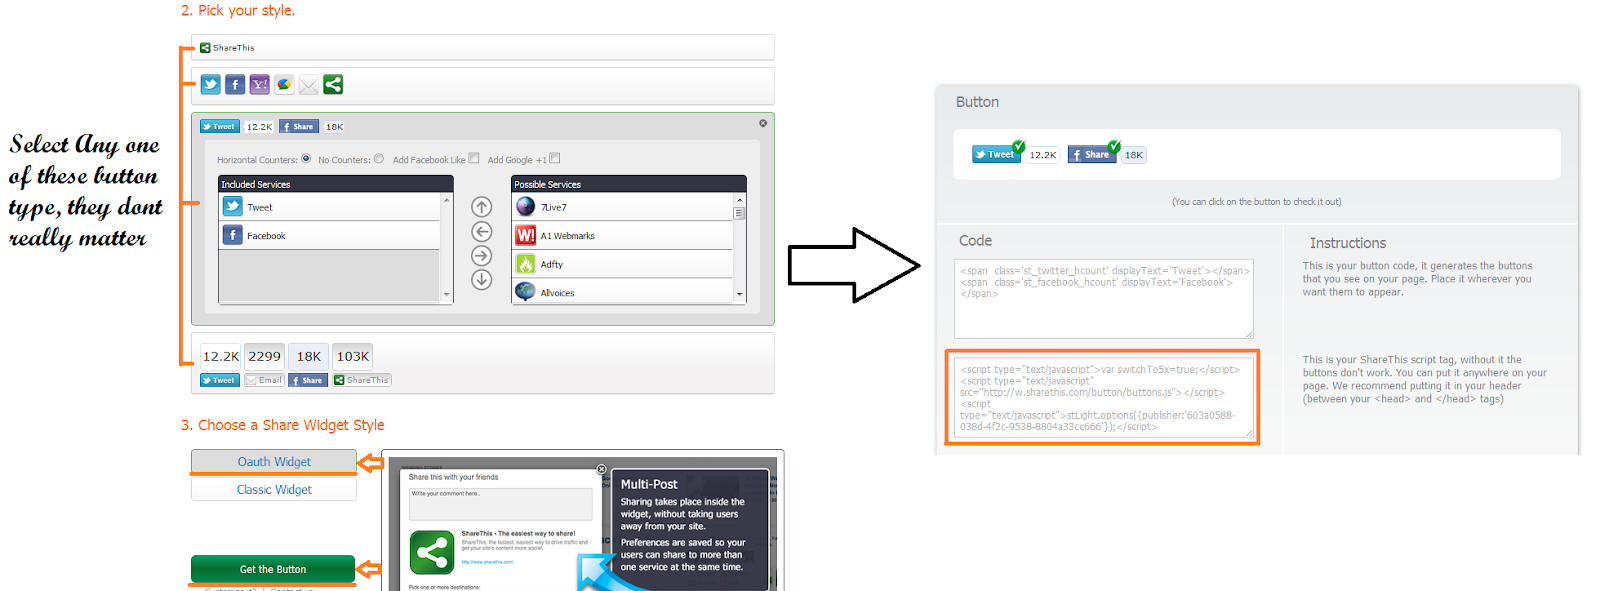
Note: After pasting this code into the gadget , you will have to go to This URL and after sharing selecting any button arbitrarily , Click on Oauth Widget > Get the Button and then on the other page copy the second Code containing the scripts. Paste this code into the Gadget. The Main purpose of this code is to make the buttons work as well as tracking the share activity.
6. Save the gadget.
7. Drag the gadget and reposition it under Blog Posts gadget.
8. Click Save button on upper right corner.
Customizing
1. Vertical alignment
Change the value of top in code line 2. The code positions the button relative to the bottom of your browser window. To fix the distance even when window is resized, specify the value in px (pixels) instead of %.
2. Horizontal alignment
Change the value of left in code line 2. Negative value pushes the button to the left of the main blog column, positive value pushes it to the right.
3. Removing and Adding Buttons
Just go to ShareThis.com and get the button code of your choice and place it in the Line 32 of the Code, for Eg
<span class='st_facebook_vcount' displaytext='facebook'/>
Now incase you want to track your share activity , just Register with ShareThis.com and Go to their Dashboard.From their you can easily track the share activity.
4. Making it Appear on Selective Page
If you want this to appear on only Post pages then you will have to go to Design > Edit HTML (As per new Interface Go to Template > Edit HTML).Tick the "Expand Widget Templates" and Then search for the Title of Gadget (If you have not given any title then give a dummy title like "abcd" and search using CTRF+F for this term) . Now see the following code
<b:widget id='WidgetID' locked='false' title='abcd' type='HTML'>
<b:includable id='main'>
PUT CONDITIONAL TAG HERE
<b:if cond='data:title != ""'>
<h2 class='title'><data:title/></h2>
</b:if>
<div class='widget-content'>
<data:content/>
</div>
<b:include name='quickedit'/>
<b:else/>
<style type='text/css'>
#WidgetID {display:none;}/*to hide empty widget box*/
</style>
</b:if>
</b:includable>
</b:widget>
List of conditional tags
Replace the "PUT CONDITIONAL TAG HERE" in the above code with any one of the thing.
1. Index (list) pages
Index pages include homepage, labels page and yearly archive page.
<b:if cond='data:blog.pageType == "index"'>
2. Post (item) page
<b:if cond='data:blog.pageType == "item"'>
3. Static Page
<b:if cond='data:blog.pageType == "static_page"'>
4. Archive page
<b:if cond='data:blog.pageType == "archive"'>
5. Homepage
<b:if cond='data:blog.url == data:blog.homepageUrl'>
6. Specific page/url
<b:if cond='data:blog.url == "PUT_URL_HERE"'>
Now after putting the conditional tag, Preview the code and then Save.
Have any suggestions, feel free to share
Demo
1 comments:
"Here's a link to our share buttons: https://shareaholic.com/pub...
You can add all the buttons you need, and have them appear on the top and/or bottom of posts.
For example, The Social Media Hat uses our buttons above their content and at the end of their posts. See how our buttons look on their site:
http://www.thesocialmediaha...
Of course, you can customize your buttons in a variety of ways in your Settings.
If you have any technical issues, feel free to reference our support center (http://support.shareaholic.... but if you can't find what you're looking for, submit a request and we'll be glad to help."
Post a Comment