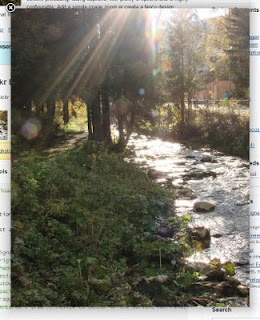
 ReMooz is an open-source widget for great looking and unobtrusive inline-pop-ups, powered by MooTools. It enables how your vistors browse through content, such as thumbnail images and HTML. ReMooz features centered or relative-positioned draggable zoomed images, content preloading, fading captions, with plenty of options and is highly configurable: Add a simple image zoom or create a fancy design element for any graphic that needs to be enlarged on your site.
Features
No plugins like Flash or Java needed, no problem with popup blockers
Unobtrusive behaviour, visitors with disabled JavaScript or old browsers can still click the images to see the full size.
Simple and intuitive behaviour: loading-indicator, close button and changing icons describe possible interactions.
No obstrusive modal pop-up: your design and content is still visible (not hidden under the common black lightbox effect).
Open several instances at one time, e.g. to preview multiple images.
Steps to Add it to Blogger:
1.Login to the Blogger account.
2. Now Go to Design > Edit HTML.
3.Now search for the </head> tag and paste the following code just Above/Before it.
<link href="http://dl.dropbox.com/u/27675057/RemooZ/ReMooz.css" rel="stylesheet" type="text/css"></link>
<script src="http://dl.dropbox.com/u/27675057/RemooZ/mootools-trunk.js" type="text/javascript">
</script>
<script src="http://dl.dropbox.com/u/27675057/RemooZ/ReMooz.js" type="text/javascript">
</script>
2.Go to the Post/Page you want to add ReMooz and then go to Edit HTML tab .
3.Now copy the code from below and paste it there.
<link href="http://dl.dropbox.com/u/27675057/RemooZ/ReMooz.css" rel="stylesheet" type="text/css"></link>
<script src="http://dl.dropbox.com/u/27675057/RemooZ/mootools-trunk.js" type="text/javascript">
</script>
<script src="http://dl.dropbox.com/u/27675057/RemooZ/ReMooz.js" type="text/javascript">
</script>
4.Now for adding the images into ReMooz,just add the images between the div tag like this
<div id="whatever">
---Images----
</div>
And then add this javascript snippet to link it with Remooz
<script type="text/javascript">

  /* <![CDATA[ */

window.addEvent('load', function() {

 ReMooz.assign('#whatever a', {
  'origin': 'img',
  'shadow': 'onOpenEnd', // fx is faster because shadow appears after resize animation

  'resizeFactor': 0.8, // resize to maximum 80% of screen size
  'cutOut': false, // don't hide the original
  'opacityResize': 0.4, // opaque resize
  'dragging': false, // disable dragging
  'centered': true // resize to center of the screen, not relative to the source element

 });


});
  /* ]]> */

</script>
5.Now save the Post/Page and see the magic.
Another Important thing to note is that all the images used in this tutorial like Next button ,Previous button ,etc are all hosted on Google Code service which are the fastest and most reliable servers on the internet with the least downtime.So you can easily implement this with no hassles for Image Hosting.


0 comments:
Post a Comment