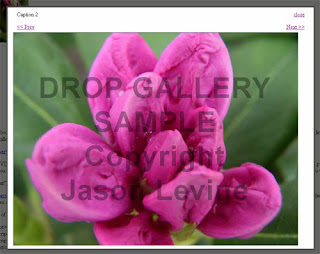
 This is a simple image viewer working as a modal windowing system.It is a little old and has a very simple interface.It automatically generates "Previous Image" and "Next Image" links if more than one image is presented in a set.
The result is that the user can use Slightly ThickerBox to create image galleries. In addition, he can create groups of galleries by setting a "rel" attribute on the links.
There is also a option for adding movies (MPEG or AVI) to a Slightly Thickerbox group and group AJAX pages together.


Steps to Add it to Blogger:
1.Login to the Blogger account
2. Now Go to Design > Edit HTML.


3.Now search for the </head> tag and paste the following code just Above/Before it.
<script src="http://dl.dropbox.com/u/27675057/SlightlyThickerBox/js/jquery.js" type="text/javascript">
</script>
<script src="http://dl.dropbox.com/u/27675057/SlightlyThickerBox/js/interface.js" type="text/javascript">
</script>
<script src="http://dl.dropbox.com/u/27675057/SlightlyThickerBox/js/thickbox.js" type="text/javascript">
</script>
<link href="http://dl.dropbox.com/u/27675057/SlightlyThickerBox/css/thickbox.css" media="screen" rel="stylesheet" type="text/css"></link>
2.Go to the Post/Page you want to add Slightly Thickerbox and then go to Edit HTML tab .

3.Now copy the code from below and paste it there.
<script src="http://dl.dropbox.com/u/27675057/SlightlyThickerBox/js/jquery.js" type="text/javascript">
</script>
<script src="http://dl.dropbox.com/u/27675057/SlightlyThickerBox/js/interface.js" type="text/javascript">
</script>
<script src="http://dl.dropbox.com/u/27675057/SlightlyThickerBox/js/thickbox.js" type="text/javascript">
</script>
<link href="http://dl.dropbox.com/u/27675057/SlightlyThickerBox/css/thickbox.css" media="screen" rel="stylesheet" type="text/css"></link>
4.Now for adding the images into Slightly Thickerbox ,Firstly add the image normally using Insert Image Button
Now When you see the codein the edit HTML window it would be something like this
<a title="1 tes" href="large3.jpg"><img src="small3.jpg" /></a> |
Make it like this
| <a class="thickbox" href="large3.jpg"><img src="small3.jpg" /></a> |
As you see we only added class tag namely "thickbox".Now to add Galleries just see the following code:
<a href="2.png" class="thickbox" rel="Group1"><img src="D.png" /></a>
<a href="9.jpg" class="thickbox" rel="Group1"><img src="5D.jpg" /></a>
<a href="29.jpg" class="thickbox" rel="Group1"><img src="7D.jpg"/></a>
As you see we only added rel="Group1".Just change it accordingly and use it multiple times to make multiple galleries.
You can also add AVI and MPEG Videos to Slightly Thickerbox:
<a href="http://dl.dropbox.com/u/27675057/ab.mpeg?width=240&height=240" class="thickbox" rel="Group3" title="Caption 4" target="_blank">MPEG Video</a>

<a href="http://dl.dropbox.com/u/27675057/ab.avi?width=240&height=240" class="thickbox" rel="Group3" title="Caption 4" target="_blank">AVI Video</a>
5.Now save the Post/Page.
Note: Please Host all the files on free hosting service like DropBox or Blogspot itself!
Another Important thing to note is that all the images used in this tutorial like Next button ,Previous button ,etc are all hosted on Google Code service which are the fastest and most reliable servers on the internet with the least downtime.So you can easily implement this with no hassles for Image Hosting.


0 comments:
Post a Comment